
We’d arrived at Ayamonte Marina on a mission to collect our new anchor chain from Ayamar chandlers.
Our current anchor chain was deteriorating badly, with lumps of rust flaking off. It was also beginning to stretch, and would regularly jump off the windlass gypsy. If we wanted to anchor in the Rio Guadiana for the winter, a new chain was essential to keep us safely moored in one spot.
Unchained Melody
In this blog, we review the options available for the new chain followed by the purchase. If you’d like to skip the technical details, click here to jump to where we face the difficult task of transporting the chain to the boat. Finally, we swap the old chain for new and take the opportunity to refresh the chain locker.
The Old Chain
The old chain comprised of 90m of 10mm galvanised chain. A high test steel D-shackle and a U-shackle connect the anchor to the chain, both calibrated to a certified breaking strength greater than the chain’s breaking strength.
Although it had definitely reached it’s end of life as an anchor chain, the old chain had served us well. We bought it in 2008 and it has seen us through 11 seasons and approximately 1800 nights at anchor since then.

What Did We Choose?
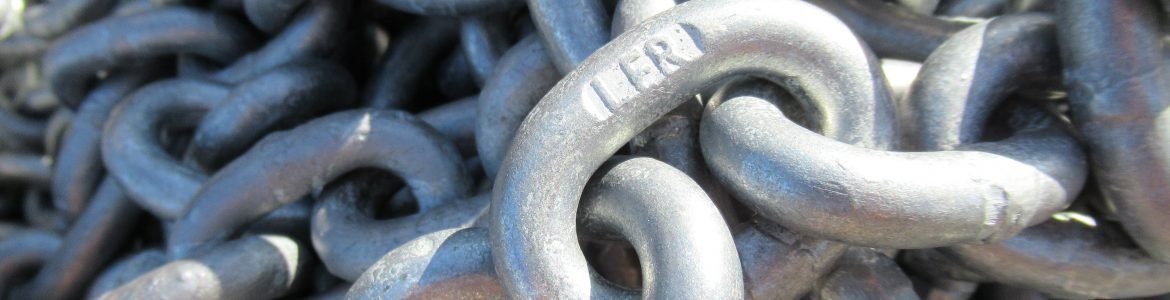
We chose 75m of Lofrans Grade 40, Calibrated 10mm anchor chain.
Why Did We Choose That?
During the summer, we’d researched the options for anchor chain. 12 years had passed since we’d bought last and there could have been numerous improvements in materials and technology over that time. In particular, stainless steel chain had risen in popularity.
Go online, and you can find a huge number of articles, debates, and opinions regarding stainless vs galvanised chain. I’m not going to repeat them here, rather I’ll highlight our reasons for sticking with galvanised chain:
- Cost: When cost is compared, the equivalent length of stainless chain is around 3 times the price of galvanised chain. We would also probably need to purchase a stainless steel swivel.
- Benefit: we could reasonably expect at least 6 years, probably more, of active life from galvanised chain. Would we get 3 times the life from stainless? We weren’t convinced.
- Risk: Each material can provide more than enough strength when it comes to holding Emerald safely at anchor. We already have a galvanised anchor, a Rocna 33kg. If we bought stainless steel chain, we would have dissimilar metals attached to each other. Opinions are mixed on the extent of risk of “dissimilar metals corrosion”. However, if there is a risk, why take it?
- Availability: there was an 8 week lead time for ordering CROMOX stainless chain, however, we needed something right now.
Rocna vs Lofrans
Obviously, safety is the highest requirement for us. Emerald is our home, and we do not take unnecessary risks. Since we bought the Rocna anchor, we can count the number of times we’ve dragged on two fingers. The first time was when Med moored in Turkey, and a sudden gust of wind blasted us on the beam. The second happened last summer when a catamaran dragged on to us. The combined weight load caused the anchor to slowly pull back through the sand whilst we disentangled. So, other than during two extreme situations, when combined with the anchor, galvanised anchor chain had done an excellent job for us so far.
The advantage of having a rust-free stainless chain that coils easily in the anchor locker was tempting, but with our budget we could not justify the additional cost of stainless. We chose to concentrate on sourcing good quality galvanised chain instead.
Known quality of supply was essential. We subsequently narrowed the suppliers down to either Rocna or Lofrans branded chain. Rocna was an option because Colin was impressed with the galvanising quality on our anchor. If we chose Lofrans, it would be matched with our windlass. They both have manufacturer’s marks stamped along the length of the chain to help guarantee the source.
Both chains have more than sufficient strength for our needs, so in the end it came down to supply. Ayamar could have the Lofrans chain within 3 days. We’d reached a decision.

How Long is a Piece of String?
The final decision was what length of chain to buy. Ideally, we’d have 90m. However, the options available from the supplier were either 120m or 75m. We could order the longer length and cut the chain down to size.
However, what were the pros and cons of choosing the shorter length?
- We’ve never set more than 60m of chain, and that was before we had the Rocna anchor.
- We have an anchor chum (also known as a kellet or anchor angel). This is a weight that is lowered down the chain to provide extra downwards pull. In effect, it extends the length of the chain. The chum weighs 15kg, which can theoretically extend the chain by an equivalent of 15m.
- Less chain = less weight at the bow.
- Every other year, we turn the chain end for end to extract the maximum life from it. Given the depths of water that we typically anchor in, in general, we don’t let out more than 35m.
- So, with 75m we would still be able to end over end.
- Realistically, transporting the chain to the boat would require a lot of manual effort. 173kg Vs 276kg is a big difference.
Collecting the New Chain
When we arrived at the shop, the chain was lying on the floor to allow us to inspect it. We checked for the manufacturer’s stamps and all looked good. With the shop assistant’s help, we formed a human chain, and hand-over-hand, coiled the links into a barrel container.

Heave Away, Roll Away
Now began the most difficult phase of the process. Transporting the 173kg of chain from the shop to the boat, a distance of approx. 600m, involving crossing two roads, and scaling numerous kerbs and speed humps. Finally, there was the perilously steep ramp down to the pontoons.
We borrowed a barrel trolley from the shop, manhandled the barrel of chain onto it, and strapped it in place. Our slow journey could begin.
Colin had the difficult task of physically pushing all that weight along. My job was route planning: to check for hazards and scout out level ground to ensure we kept the barrel centered. Any movement of the chain inside the barrel could result in a huge weight shift, potentially toppling it sideways and off of the trolley.
In our experience, the Spanish have little regard for pedestrians. I’d hate to have to push a pram or be a wheelchair user along some of the footpaths we’ve tried to walk. Heights change randomly in addition to their width. Solid objects such as lampposts can be found in the middle rather than by the edge, leaving insufficient space to get by. We consequently resigned ourselves to taking our chances with traffic and walked along the edge of the road.
But here there was a speed hump! I went on ahead to see if there was an alternative route around, but I couldn’t find a better option. We heaved and hauled and finally got the package safely over the raised lump.

So Close, Yet So Far
The final challenge was to negotiate the slope down from land level to the pontoons. At low water, this is a crazy steep angle to walk even without a heavy load. Thank goodness we were close to high water, making the angle much more manageable.
But, even at high water, then was a slope to negotiate. If Colin lost control and the trolley got away from him, there was no way I would be able to stop it at the bottom. It would most likely end up rolling off the side of the pontoon and splashing into the sea. It was a slow, heart in mouth few minutes that seemed like hours. We both breathed a huge sigh of relief when the trolley and its precious cargo were at the bottom.
Now we just had to wheel it the final 200m along the wooden pontoons to Emerald. The end was in sight! However, I relaxed too much from my scouting duties and an uneven plank nearly scuppered us. It was Colin’s quick reflexes that saved us from a watery disaster.
After all of that, manhandling the chain from the barrel, onto Emerald’s deck, and then back into the barrel seemed relatively easy.
Wash, Shop, Repeat
However, even with the precious cargo safely stored, we couldn’t rest. By the time we left the marina, 24 hours later, Emerald had had a good clean, inside and out, as had us and our clothes. She was sitting slightly lower in the water, a result of topping up the diesel cans and restocking the food and beer supplies. The marina does not have a fuel station, so we took several trips to the nearest road-side station with trolley and cans.
We were ready for a winter up the river.


Ready to Go Back Up River
We were like giddy children when we set off back up river the next morning. We were both excited about our new adventure, spending a winter afloat in the river.
There wasn’t enough wind to sail, but the sun was shining and we were able to enjoy a relaxed passage with the tide. Bird spotting kept us entertained along the way.
Having arrived back at the villages of Alcoutim and Sanlucar, we chose to continue a little way past and anchor north of them. This would become our winter anchor spot.


Swapping the Chain
Logically, we couldn’t swap the anchor chain over whilst at anchor. Therefore, we required an alternative type of mooring. We could have remained in the marina, but there were also pontoons at Alcoutim. We chose to go upriver and kept a look out for a space.
A few days after our return, a place came free alongside the Portuguese pontoon and we began the changeover.
A wooden insert divides Emerald’s chain locker space into two. One half holds the main anchor chain, the other contains part chain, part rope rode which is attached to our second anchor. Once all the chain and rope was out of the chain locker, we were able to give the space a good inspection. Years of dried out seaweed and mud, as well as rust, had gathered in the bottom and stuck to the sides. After a clean, we also decided to take take the opportunity to repaint the locker. It had been a good few years since the current paint had gone on.
The Chain Locker is a favourite pub of ours, located in Falmouth, UK. Unfortunately, the chain locker Colin would be going into wouldn’t be as much fun. Colin contorted himself into the small, awkward space in order to reach the far end. Power is included in the pontoon fee, so we squeezed a small, electric heater into the space to help with drying.


Painting the anchor locker divider The weight of chain has deformed some of the wood Colin squeezed into the anchor chain locker A clean and painted locker


Marking Up the Chain
We mark our chain using plastic and rubber, coloured chain markers. The colours we have are pink, yellow, blue and green, which we order in the colours of the rainbow. The mnemonic Richard Of York Gave Battle In Vain has somehow managed to stick in both our heads since school days. It’s important to have the colours in an order you can easily and quickly remember.
So, pink (close to red) = 10m, yellow = 20m, Green = 30m, and blue = 40m. Beyond that, we double up the colours, two pinks = 50m, etc.
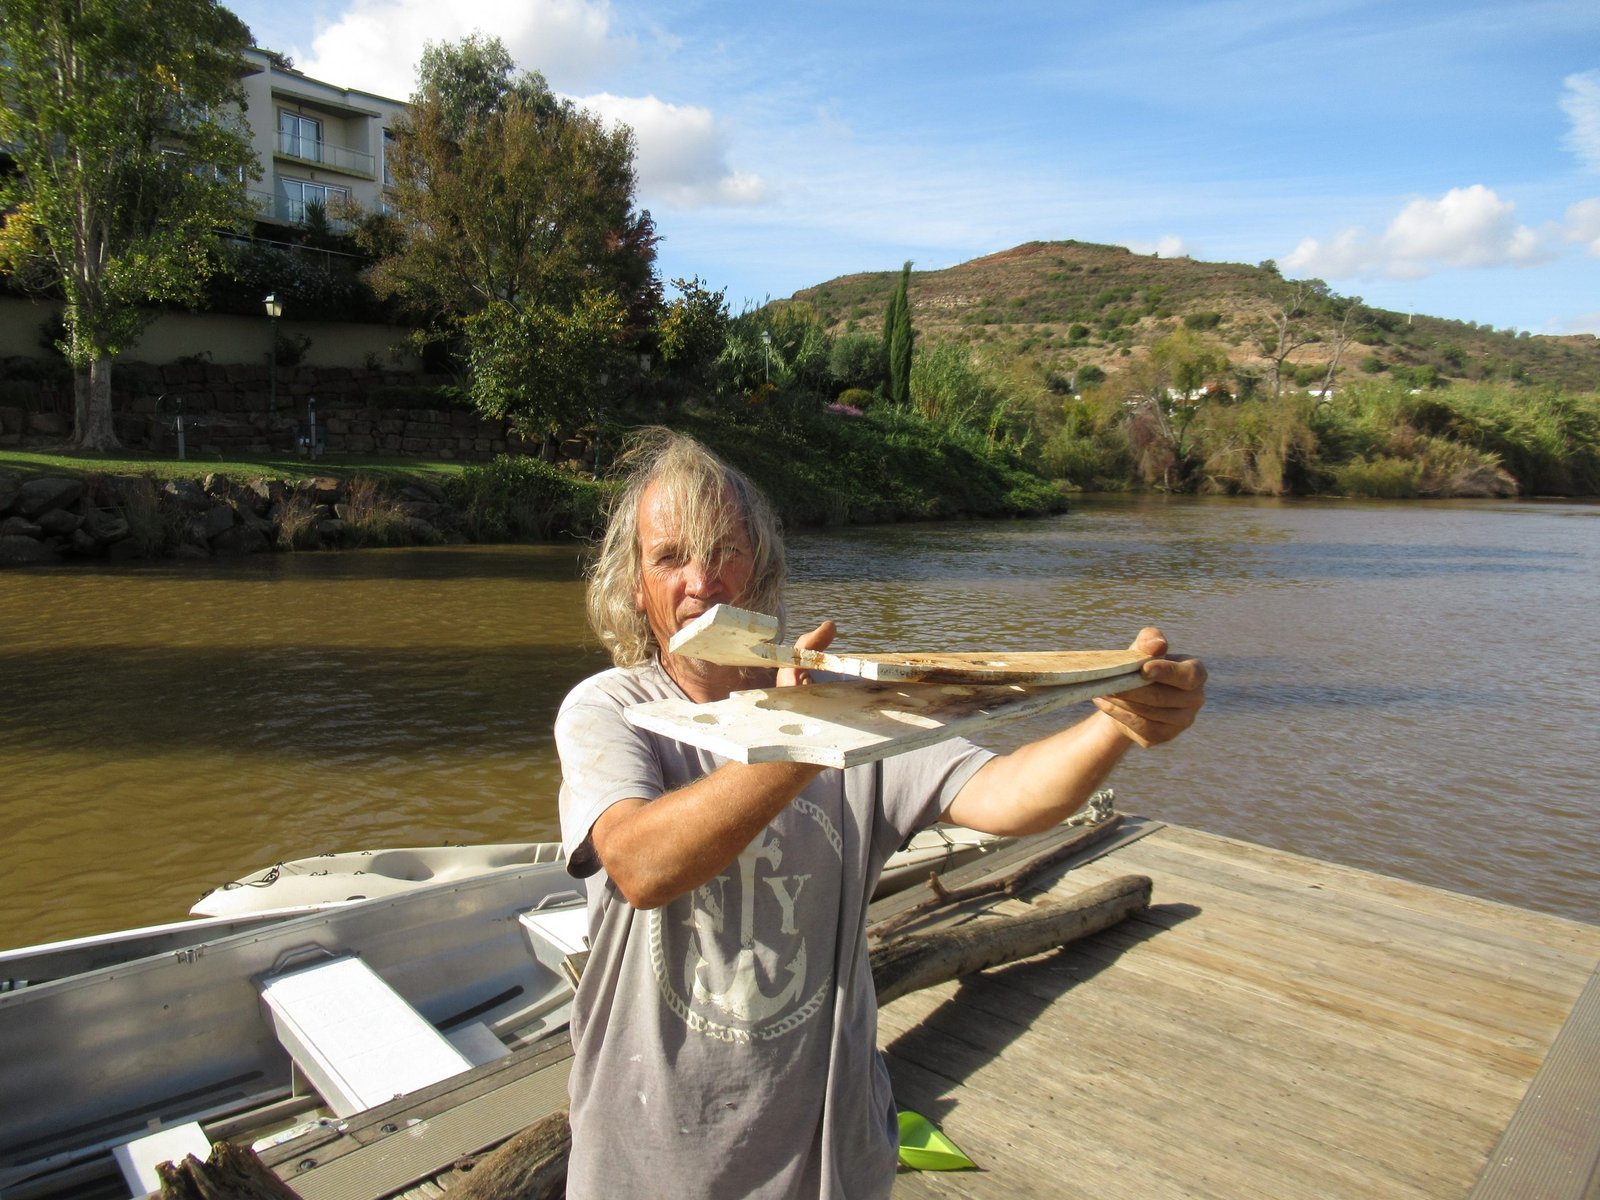
As the markers are so small, they can be difficult to see whilst the chain is feeding out. To help with this, we paint the chain white along the 10 links around each 10m mark.
We then paint every 5m between the white marks in red. We’ve found spray paint works well in terms of application. It doesn’t last long – after all the seabed is a hostile environment, but it usually manages a season of use. Each winter we remove the chain from the locker, clean, inspect and repaint.
Chain laid out in 10m lengths Chain markers show up clearer against the white paint Red marks 5m between the white Pink denotes 10m, green 30m. Two pinks are 50m, two greens are 70m


Another New Skill
The “bitter end”, you’ve probably heard the phrase.
the conclusion of a difficult or unpleasant situation; the last or furthest extremity: Despite the unpleasant scenes in the movie, she insisted on staying until the bitter end. Nautical. the inboard end of an anchor chain or cable, secured in the chain locker of a vessel.
www.dictionary.com
The bitter end in our case is the connector between the boat and the chain. It’s typically made from rope, allowing it to be cut in an emergency, and freeing the anchor.
Since our liveaboard life began, Colin has learned the skill of splicing, making many braid-on-braid, 3-strand, and octoplait type splices. To make our new bitter end, he had a new method to learn: an octoplait rope-chain spice.


We’re On A Boat Job Roll!
The last job was to feed the new, marked-up chain into its new home in the freshly painted anchor locker. After a week on the pontoon, Emerald was ready to head back out to anchor.
Having been back upriver for only a couple of weeks, we’d already got one boatyard job done. We were on a roll!

Sailing Info
17th October: Ayamonte Marina to south of International Bridge – 1nm
Anchored in 7m in mud, 37 13.322’N 7 24.679’W
18th October: Rio Guadiana International Bridge to north of Alcoutim – 18nm
Anchored on east side of river, 6.5m in position 37 28.834’N 7 28.068’W
26th October: Alongside on north Portuguese pontoon
2nd November: We left the pontoon to re-anchor in position 37 28.8’N 7 28.094’W
The Social Media Bit: Want to Follow Us?
If you’d like to follow us on other social media platforms (Facebook, Instagram and YouTube), you can do so by using these links:
Or use the link below to track our voyage on NoForeignLand.com.

And finally, you can sign up to receive email notifications of new blogs using the subscribe box at the bottom of this page.
Thank you from Nichola & Colin