
I’m convinced boat toilets were designed to make sure boat owners could never be too happy and relaxed. It’s a rare one I’m sure that has never suffered a blockage, critical part failure, or had holding tank issues. And most likely these failures occurred at the most inconvenient time. Cue a nasty, smelly time to resolve the issue. Could a composting boat toilet remove these issues?
In 2015 after several unscheduled toilet fails, we’d begun to think about replacing our sea-water flushing toilet with a composting/waterless toilet. This year, we finally bit the bullet and completed the job. In this article, we review our experiences with a standard boat toilet and the questions we had when it came to changing to composting. We then take you through the build and conclude with our verdict after two months of use.

What Was Wrong With the Flushing Toilet?
Emerald is a Kelly Peterson 44 design. She originally came with two heads (the nautical term for a bathroom), one forward and one in the aft cabin. When we began living on her in Brighton marina, we soon realised we only needed one. The aft head subsequently became a dumping ground for all those things that didn’t have another home. It rapidly got to the point where we’d have to open the door very carefully, poised to catch anything that might fall. After a few years living like this, we chose to rip out all the bathroom fittings, removed the through-hulls and filled in the holes, and built storage into the space.
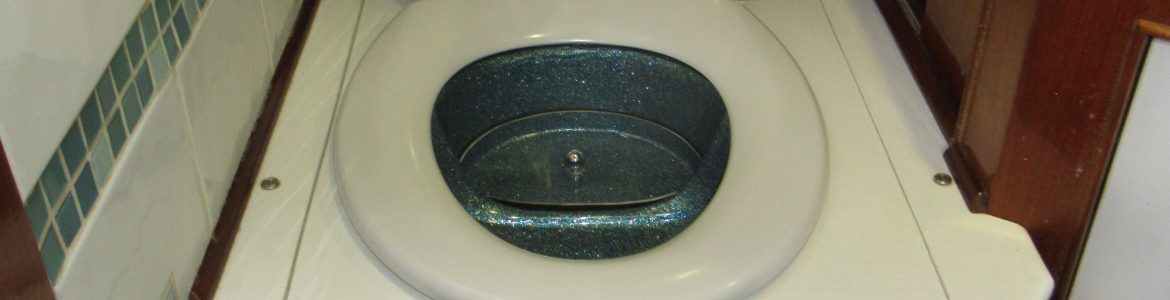
When we bought Emerald, she had recently had two new Groco K Series, manual toilets installed. As boat toilets go, they rank pretty highly. With a good-sized bowl and standard seat, they were solid and well built. To pump out, we pulled a lever back and forth, pressing down with our foot on another lever to flush water through, then removing our foot and continuing to pump the handle to clear the bowl.
In general, they worked well. But, after 15 years of full-time use, major parts were failing. We could only source replacements and service kits from the USA with postage generally costing more than the parts themselves.

Holding Tanks Vs Pumping Out
Holding tanks store toilet waste until you can get to a place to empty it. At the time of writing, Turkey is the only country in the Med that specifies that a holding tank for black water must be installed on visiting yachts. As we knew at some point we’d want to visit Turkey, we installed a holding tank and diverter system whilst in the UK. The diverter valves allowed us to choose between sending waste from the toilet to the tank or pumping straight out to sea, as well as being able to pump the tank out.
However, there are very few pump out facilities in the Med, other than in Turkey. And even in Turkey, not all were suitable for pumping out from a small yacht.
This means, that in reality, boats go a few miles offshore and empty their tank there. Ever seen a brown slick on the water surface? Most likely it’s from a boat that has recently emptied it’s tank.
Also, what happens if the tank becomes full when you’re anchored, but the weather doesn’t allow you to get offshore? The stark reality is, that it will be emptied out into the anchorage. And what about a blocked tank? Luckily, we’ve never experienced this, but we know of several who have had this unpleasant experience.


Why Do Boat Toilets Fail?
Whenever we pump out urine into the sea, a chemical reaction takes place between the seawater and uric acid, forming a calcified scale. The end section of the outlet pipe is below the waterline, and subsequently always contains seawater. So, over time, the scale builds up on the inside of the pipe until eventually, only a tiny hole remains. We never put paper into the toilet, choosing instead to have a waste bin. But as the hole shrinks, it becomes harder and harder to pump the solid waste out.
Preventative Maintenance
After a couple of unscheduled toilet fails, we set up a system of preventative maintenance.
- On a daily basis, we flushed vinegar into the toilet before bed and gave a few pumps on the handle to distribute it around the system. This slowed down the scale’s rate of growth but didn’t stop it.
- We pumped freshwater through every few days, to remove the uric acid from the system. But we didn’t have sufficient stores to fully switch to freshwater for every flush.
- Once a year:
- we cleaned the solid scale from the pipes,
- replaced any pipes that were really blocked,
- used the Groco service kit to replace worn valves and membranes.
But even with all this care, the toilet would still fail, and usually at the hottest time of the year.
What Is a Composting Boat Toilet?
I recently learned that composting toilets should really be called waterless toilets.
They work by diverting liquid and solid waste into separate containers. At a time of your choosing, the liquid can be poured away. The solid waste remains for as long as your box takes to get full. Generally, some form of covering material is used – for example coconut coir, sawdust, or cat litter. Over time, natural bacteria break down the waste, until eventually, it is safe to use as a fertiliser on plants. However, the solid waste can take a year or more to fully compost, and we don’t have the space to hold onto our waste for that long.
To Compost or Not to Compost, That is the Question
We first began to think about a composting boat toilet in the winter of 2015-16. It seemed to fit with our environmental aims for “greenness” and would offer many benefits:
- no more blocked pipes,
- removal of meters of pipework to free up space,
- simple maintenance and no costly spares kits,
- blocked pipes and nasty toilet failures would be a thing of the past,
- no more pumping out into the sea,
- silent use.
Budget
When we first starting considering switching to a composting loo, there were very few models available, with the market leaders being Nature’s Head and the Air Head. The cost of these units at £800 plus delivery, made our eyes water. We just couldn’t justify that within our budget.
However, in the last few years, there has been an increase in the number of people looking to live off-grid, both on land and on the water. This has increased demand for composting toilets and allowed new suppliers to come into the market. Five years on, we had a much wider choice of products, many with much lower costs than those original models.
The Sniff Test
We’ve never had a bad smell from our toilet, but I’ve been on boats that had a constant toilet smell, and I knew I couldn’t live with that. However, I wasn’t fully convinced that a composting loo, particularly one in the confined space of a boat, would not smell.
So, since the idea had first planted itself in our brains, we’d been on the lookout to meet another boat with a composting toilet. But they turned out to be rarer than hen’s teeth, and it was only in October last year that the opportunity for a live sniff test presented itself.
“Can I smell your loo?”
This question would not rank high in the list of things to ask new friends, but thankfully they knew exactly where I was coming from. I had a good sniff around and, amazingly, there was zero smell. I was sold. We could now move on to whittling down the list of potential suppliers.
What Did We Choose?
Our choice was a build-it-yourself components kit from Strumpet and Trollop, a British company. It ticked all the boxes on price, availability, simplicity, and fit to our space requirements.

All the components are made with anti-bacterial materials. The kit contained:
- a 10l liquids bottle with handle and cap,
- a 23l solids box with lid,
- the separator. As a treat to ourselves, we ordered it with a custom, turquoise, glitter spray to match the sink top tiles,
- a modesty bung that keeps the solids bucket covered between use,
- a soft close, plastic white seat,
- a roll of compostable bags.
The Installation
It would not be a simple installation. We had to remove the old toilet and its network of pipes and investigate and repair the rotten floor. Then there was the construction of the new box, with numerous physical limitations to consider: the curve of the hull, the size of the collector boxes, and the length of our legs. Plus throw in the fact that nothing is ever square on a boat.
Bucket and Chuck It
With the bathroom in pieces, and having ripped out our second head, our only toilet alternative during construction was to use a bucket. We also had nowhere to shower. But this was ok, there are showers ashore. Except then the boiler ashore broke. Inadvertently, we were doing the installation during the coldest winter that Portugal has experienced for 10 years and the freezing weather made it beyond bracing to take cold showers. We briefly tried showering on deck using hot water in our PortaShower, but the weather soon put paid to that too.
The poor weather also impacted the construction as there were days when Colin couldn’t work outside. The result was that construction took a little longer than expected and occasionally tested our emotions. Certainly, it would have been an easier job whilst in a marina with bathrooms on hand. But we survived these minor hardships, And as Portugal went into a full Covid lockdown, it didn’t matter if we smelled a little more than usual, as we couldn’t go out and meet people.
Removal of the Old Toilet
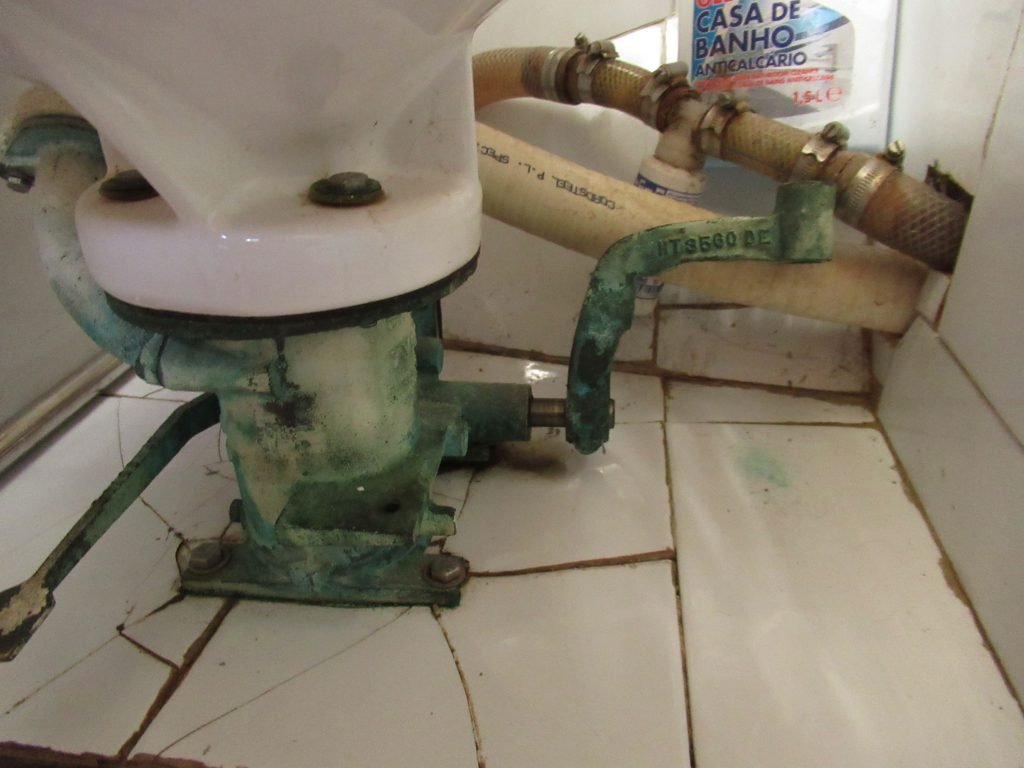
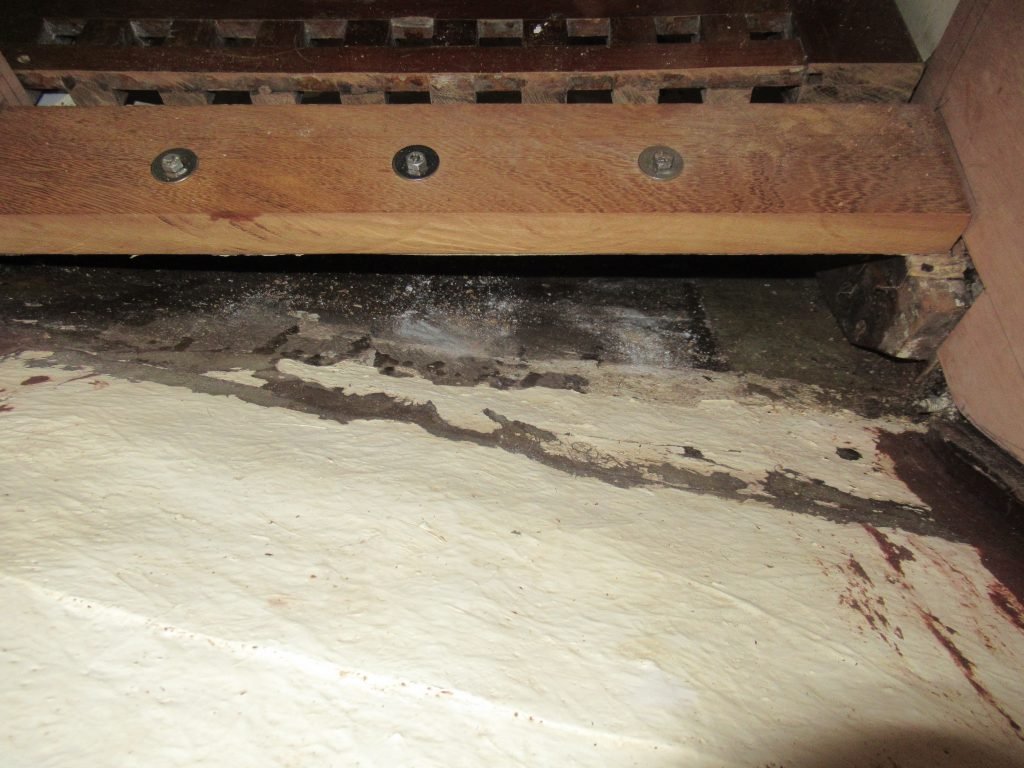
Colin removed the bolts from the Groco toilet base and ceremonially placed it on deck until we can find it a new home. He then ripped out the base on which it had stood which had rotted due to water leakage. We could now clearly measure the available space for the installation.
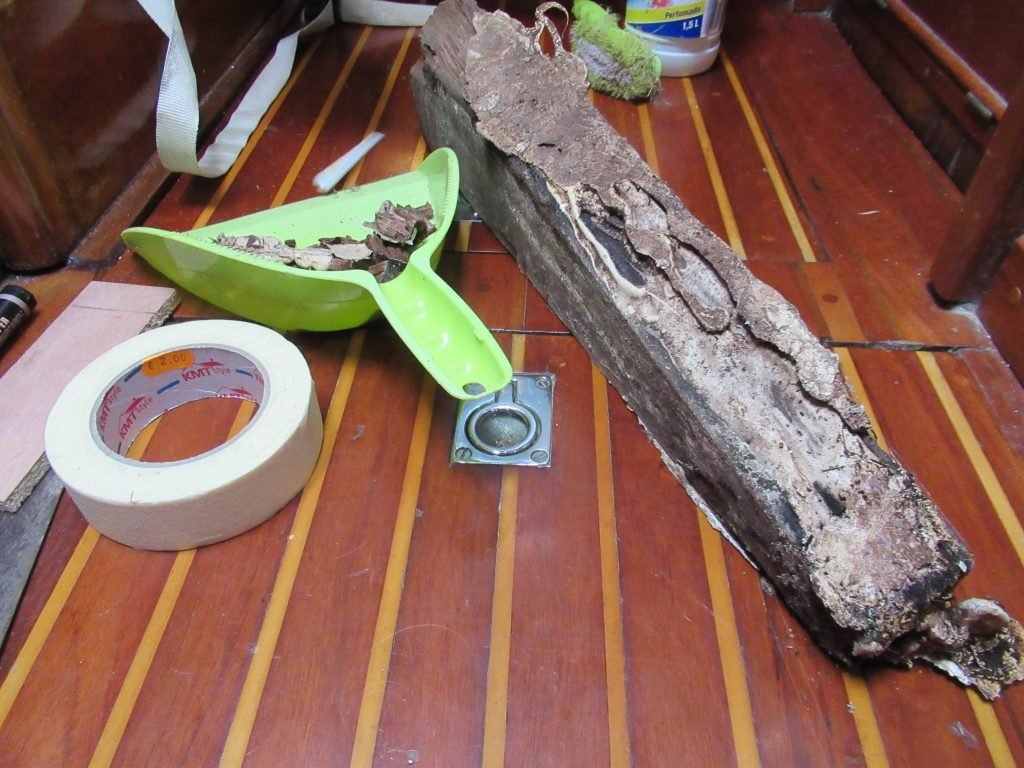
Repair
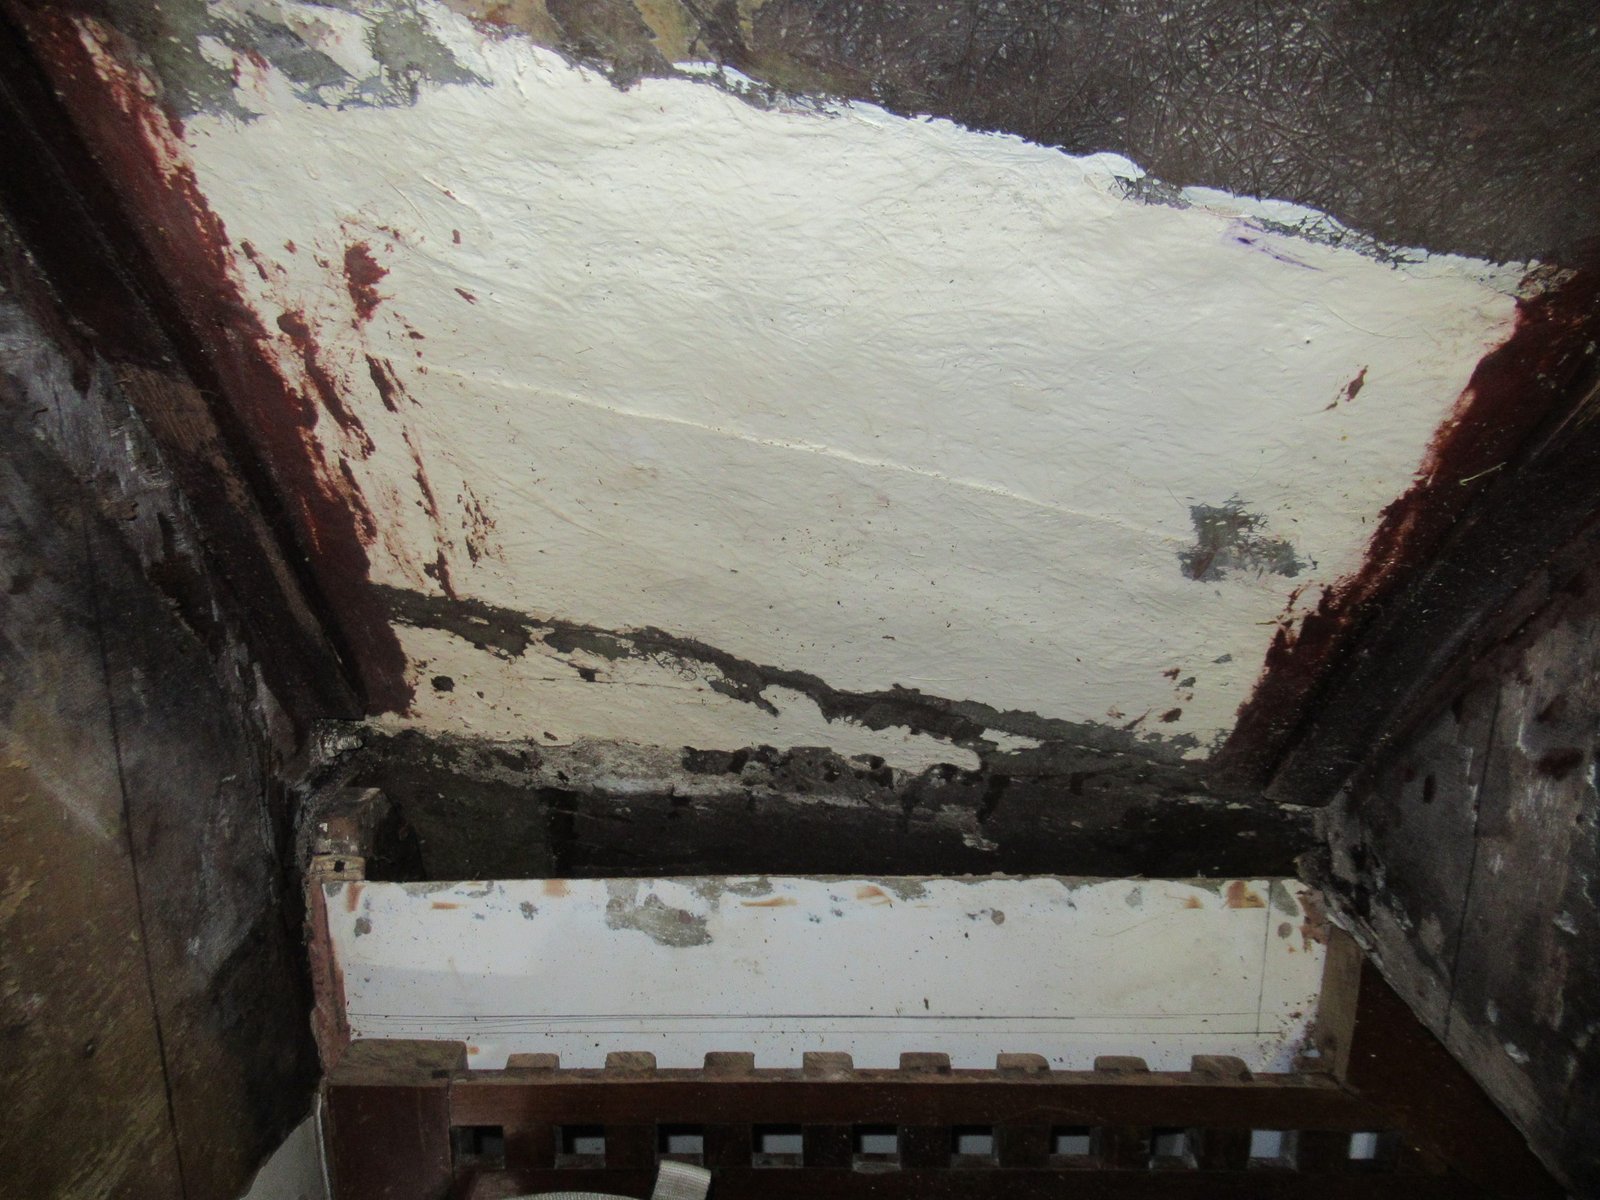
The first item of repair was to identify the source of the water that had soaked into the toilet base and rotted the wood. Without fixing this, we would be leaving ourselves open to the water damaging the new install which would be largely wood based.
Water had also soaked into the bulkhead wall, which could have caused structural problems if it had been left unchecked.
The source of the water was condensation running down the inside of the hull. Normally, this would flow down into the bilge to be pumped out at some point. But over time, the drain holes had become blocked with debris and the water had nowhere to go and gathered under the toilet base. Eventually, the wood soaked up the water and began to rot.
The repair involved enlarging the drain hole to the bilge and reinforcing the floor where a rotten lump of wood was removed. The bulkhead was strengthened with epoxy, hardwood battens, and a sheet of ply.

Removing the tiles Some tiles required cutting With the tiles gone, we could see the water damaged wood Bulkhead damage A lump of rotten wood was removed from under the floor The rotten wood used to be in this gap Epoxy and battens to reinforce the bulkhead wall A much bigger space for condensation to run Floor reinforcement


Building
The toilet surround was built from good quality ply, using 10mm for the base and walls, and 12mm for the top. Once the pieces were cut to size, we gave them a coat of undercoat followed by one of white gloss. As a decorative front, Colin made battens from iroko in a tongue and groove style. We’ve been carrying around the iroko planks since we headed south, so it was good to finally find a project for some of them. These were then varnished to give a glossy finish.
We reluctantly had to cut a piece out of the teak shower grate in order to get the box to fit without it being too high.
For the time being we’ll keep the through hull and have used it for emptying the shower sump.
- When it came to the tools required for the job, we already had most of them on board. The only new purchase was a router:
- Black & Decker Workmate
- Angle grinder with a diamond blade for cutting out tiles
- Power8 table saw
- Electric drill
- Electric sander
- A handheld detail router which was used for edging the front of the box and cutting the rebate for the separator.
The side walls A floor and battens for the lid Colin’s workshop A curved edge on the hinged lid Lovely chamfered edges Marking out the hole Making the separator recess Separator in place Modifying the shower sump floor Painting Painted pieces in place Boxes and separator in place Gluing down the separator Iroko planks Cutting the planks into strips Strips ready for sanding Hand sanding the strips Cutting to size Gluing to the front wall Varnished and ready for fitting


Adding a Fan
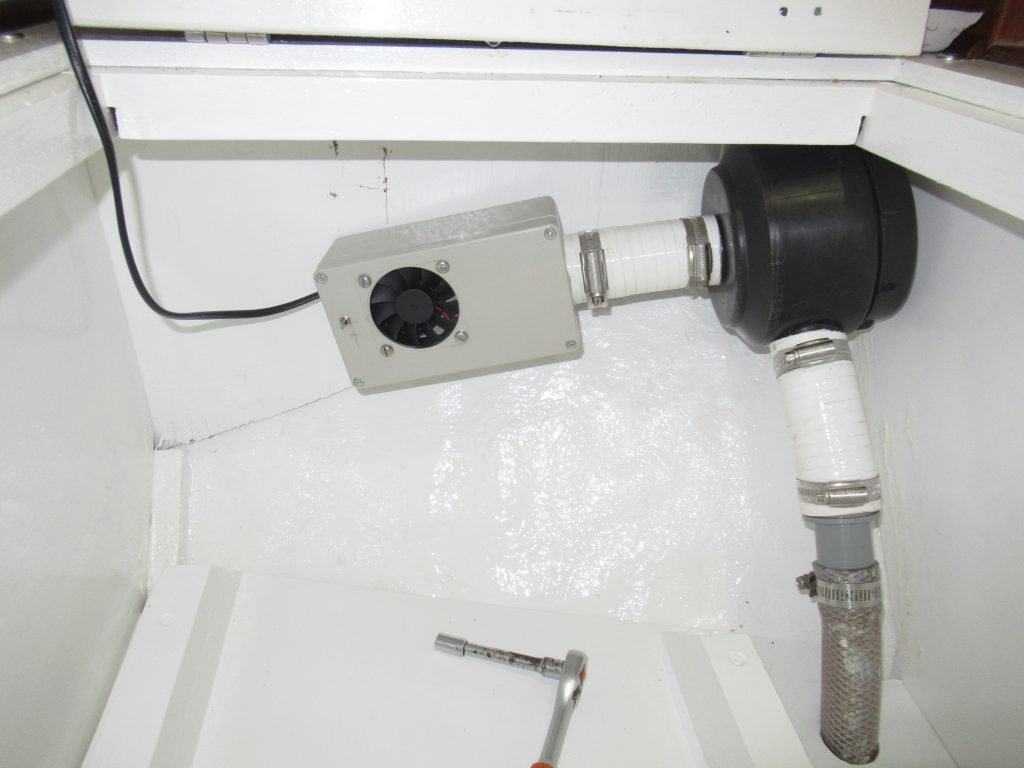
We were in two minds about whether to install a fan, but after the first few weeks of use, we noticed condensation was forming inside the solids box. We wired in a 12v computer fan, permanently on, that extracts air and pushes it through a Leesan carbon filter into the bilge. The filter was repurposed from the holding tank. Since installation, there has been no condensation.
The Verdict
We’ve now been using the toilet for two months. We’ve got into a routine of emptying the liquid bottle once a day and the solids box every 8 to 10 days. The separator has a shiny wipe clean surface, which has proved easy to keep clean.
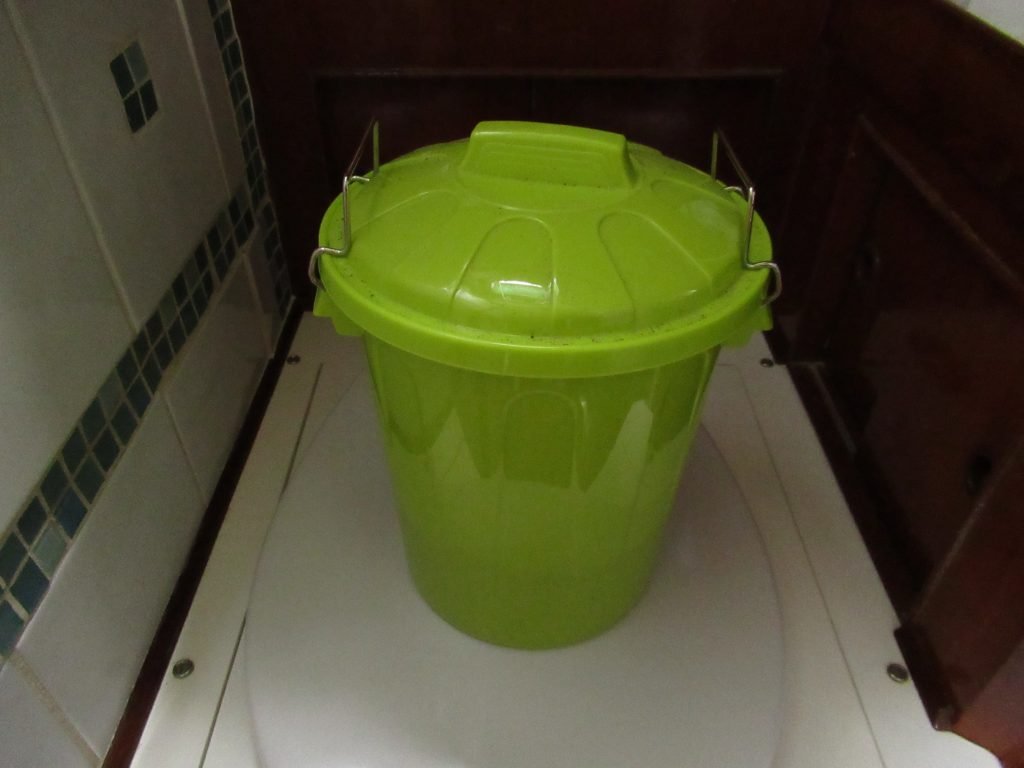
We chose to use coconut coir as a cover material; after going, we sprinkle a handful over the top of the waste. The coir is kept in a bucket with a lid to keep creatures out.
There’s no smell.
There were teething problems, but they were minor and we’ve since ironed them out:
- The first time we used the toilet, we let the solids box get too full and the bag split as we were removing it. Luckily the split happened before we’d fully lifted the bag out of the box. However, there was still intense yuck to be cleaned up.
- Positioning: This is more an issue for women than men as they have an inbuilt aiming device. The separator directs liquids into the pee bottle and there is a hole to access the solids bucket. It’s important to keep the liquids and solids separate to prevent smells? It took a little experimentation to find the right spot in which to sit to get things to go to their correct location.
- Due to the space limitations, the box is a teeny bit high off the ground for our short legs. I’ve since got used to this but it has the potential to be awkward in a big sea. If it is an issue, we’ll make a step.
- We haven’t used the loo whilst heeled yet. A lean-to starboard should be ok, however, a lean-to-port might cause pee to flow into the solids bucket. Ideally, the loo would have been placed fore and aft, but we don’t have the space for that. But, given how little time we spend heeled over, this is a very minor problem.
Costs
The total cost of the installation was approximately £400, which breaks down as follows:
- Strumpet and Trollop kit (including modesty bung and glitter spray): delivered to Portugal (pre-Brexit) £284
- Wood supplies £50
- Paint and brushes £20
- Fan £8
- The iroko wood, varnish, and epoxy came from existing supplies that we already had onboard.
Ongoing usage costs are approx. £3.50 per month, made up of:
- Coir blocks £1.50 for a 650g brick that provides approx. 3 weeks of usage.
- Biodegradable bags £0.50 per bag

The Social Media Bit: Want to Follow Us?
Thank you for reading this far, we really appreciate it. If you’ve enjoyed our site or found it useful, please consider a donation via the DONATE button below. We’re grateful for anything you can spare!
If you’d like to follow us on other social media platforms (Facebook, Instagram and YouTube), you can do so by using these links:
Or use the link below to track our voyage on NoForeignLand.com.

And finally, you can sign up to receive email notifications of new blogs using the subscribe box at the bottom of this page.
Thank you from Nichola & Colin
Fascinating and very useful account Nichola! Several weblogs I follow regularly have discussions around the travails of marine flushing heads versus desiccating heads, plus the troubles around overboard waste disposal. We are about 2 months out from ordering a new build compact (34ft) catamaran which has 2 heads, with the one on the owners’ side being mounted in a very space challenged position (at a 45 degree angle in order to allow passage to the separate shower stall). We are definitely planning to replace the default flushing heads on the less specially challenged guest side with a dessicating toilet but are unsure if the space constraints on our side will allow for it … so as soon as I read your piece I emailed Strumpet & Trollop (what a delightful name choice!) enquiring whether they might consider the challenge of a custom made casing to fit our boat. Am now waiting for a response … glad for your signposting as had already given up on the other marques on this niche market.
Thank you Kai and glad to have been able to help in some way. Exciting times for you as you get closer to your own boat. Fingers crossed that S&T can come up with something for you, please let us know how you get on
Thanks for this really useful and informative “build your own” water less loo article! I am currently installing a separator from kildwick.com on my new build 34ft cutter here in Cape Town Town South Africa. I have some questions after longer use. 1) Any issues with the heat/humidity of summer? 2) Some users talk of fly/insect infestations? 3) Why exit the fan inboard vs outboard and do you pull the air from outside or just the heads? 4) After 8-10days filling the solids “bag” how do you store aboard then dispose ashore? 5) Lastly any tips on solids “bag” and what about loo paper? Thanks for the useful info on River Guardian too. Brilliant.
Hi Alasdair, glad we could be of help! To answer your questions:
1. So far we’ve been in max temps of around 35 centigrade and haven’t had any issues. The fan helps move the air around and the coconut coir soaks up moisture.
2. We did briefly have flies so we started sprinkling diatomaceous earth into the container which has solved the problem. Every time we start a new bag, we sprinkle a spoon of the powder into it. You should be able to buy it from garden centres or online. A little goes a long way.
3. It was easier to exit the fan inboard as we didn’t want to make a hole in the coach roof. The air is pulled from in the heads, but goes through a carbon filter so there are no smells. The lack of smell is the most amazing thing I’ve found with this type of loo, I was really expecting to have to get used to a fusty smell, but there’s nothing!
4. We take the bags ashore straight away to dispose of them. Where we’ve been since installing this toilet there are communal bins along the streets and in marinas/harbours. We have been talking recently about whether we would dump the contents minus the bags into the sea if far offshore (as boats with holding tanks do) but it’s not something we’ve had to do yet.
5. Bags… We started using biodegradable bags but they weren’t very strong, which resulted in a near disaster when it came to emptying one time! So at the moment we use sturdy, non degradable bin bags that are large enough to fill the solids box. We place this bag into a second plastic bag (one of those supermarket sturdy shopping bags) to transfer ashore – the second bag can then be removed and reused once at the bins. Our paper goes into a small separate bin which is emptied every few days. We did the same for paper when we had a flushing loo too. We’d prefer to use degradable bags but we just haven’t found any that we trust yet.
The Guadiana is wonderful – hopefully you can visit there sometime.
Let us know if you have any other questions, we can try to help, and hopefully your installation goes well.
Nichola & Colin