
In December, an overheating propeller shaft had necessitated our return to Porto Santo during our passage south to the Canary Islands. We had been slowly motoring for under two hours, with a forecast of north east winds picking up later in the day. Colin had been checking the prop shaft, which was warm but not worryingly hot. Then, we increased the engine revs. Almost instantly we heard a bad sound from inside and promptly stopped the engine. This time when Colin went to check the prop shaft, it was burning hot to touch. You can read more about it here.
We made the decision to turn back to Porto Santo, limping slowly back on much reduced engine revs. After all, both ours and the boat’s safety was paramount.
Back To the Boatyard
Due to Emerald’s design, there was no way to safely investigate the drive train without having her lifted out of the water again. The boatyard in Porto Santo is small and in high demand, but we were offered a place potentially in early January. In reality, early January turned into late January, but beggars can’t be choosers. We were just very grateful that a space was available as we were reluctant to travel elsewhere without knowing what the problem was. Further use of the prop shaft could exacerbate the damage and lead to water ingress.
Leaving the Pontoon was Very Stressful
When we’d returned to Porto Santo, we’d shoe-horned Emerald into a cosy space back on the pontoon. We don’t have a bow thruster, so instead we used people power! But, now we had to get back out, and there were several factors working against us.
- We use our prop walk to manoeuvre in tight spaces, but on this occasion it worked against us.
- We couldn’t risk using too many revs on the engine in case we aggravated the damage.
- And finally, there was no space to drive out and forwards, we would have to make an immediate 180 degree turn, into the wind.
The Morning Dawned Blustery
For much of the time that we’d been on the pontoon, the wind had been blowing us off. But, as Sod’s law has it, on the morning of the lift out, the wind was trying to blow us back onto the pontoon. And not just lightly.
We didn’t get much sleep the night before, as our worries joined forces with the noise and movement from the strong gusts of wind and occasional downpours as a mini storm passed over us.
But, somehow, come morning, we made it away from the pontoon, once again with help from the community. This time we decided to go into the crane forwards rather than backwards which gave Emerald much better clearance in the lift. This meant that we didn’t need to take the wind generator down, but instead we had to loosen the backstay and completely remove the forestay and inner stay.
Emerald was placed back in the place where she’d spent most of 2023, but now with her bow pointing north, rather than south.

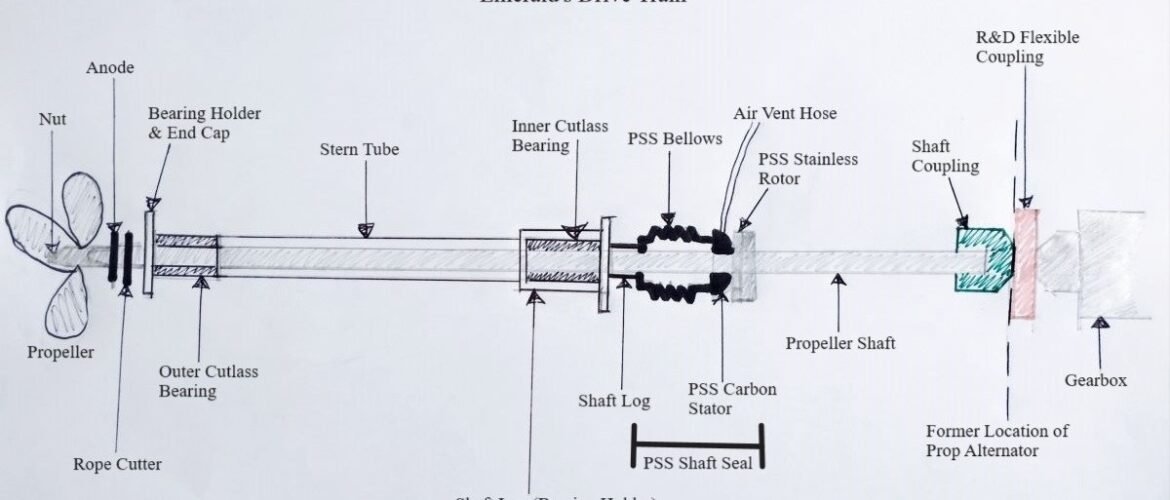
Emerald’s Drive Train (Propeller Shaft)
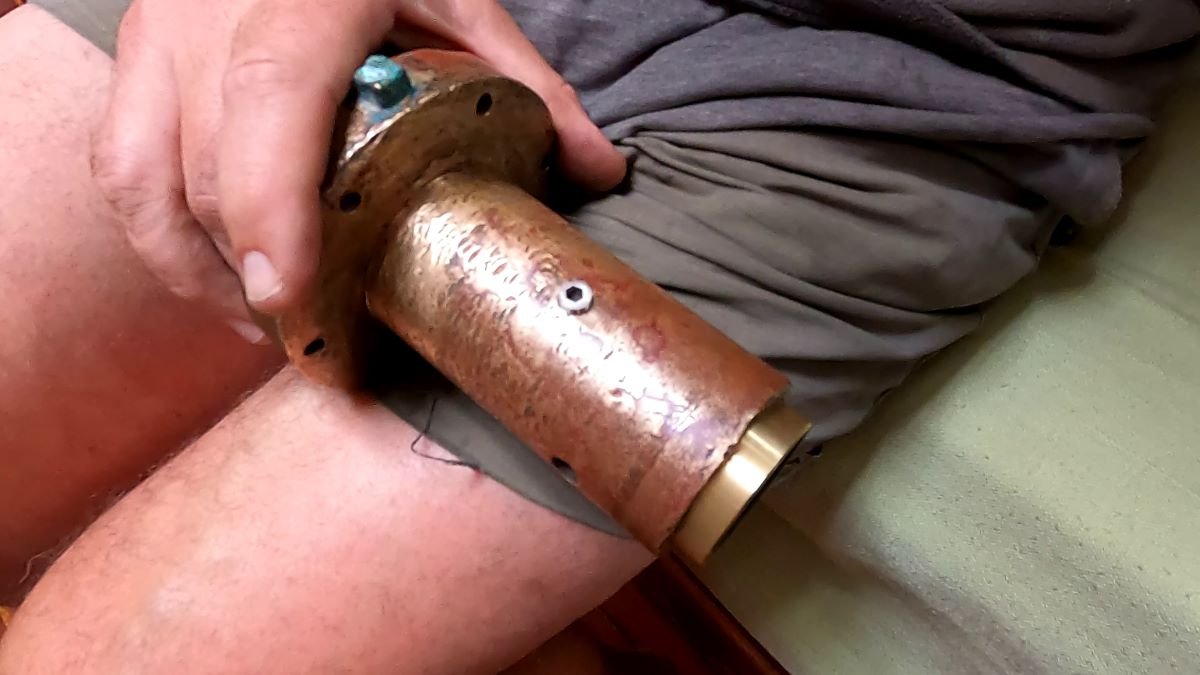
Emerald is a centre cockpit boat, with the engine located just aft of the centre of the boat. This means that a 2.7m long propeller shaft is needed in order to connect with the propeller at the stern. The shaft is made from stainless steel and sits within a hollow tube, with a cutlass bearing at the inner and outer end of the tube. The bearings have a rubber inner, their purpose is to provide cushioned support for the prop shaft at each end.
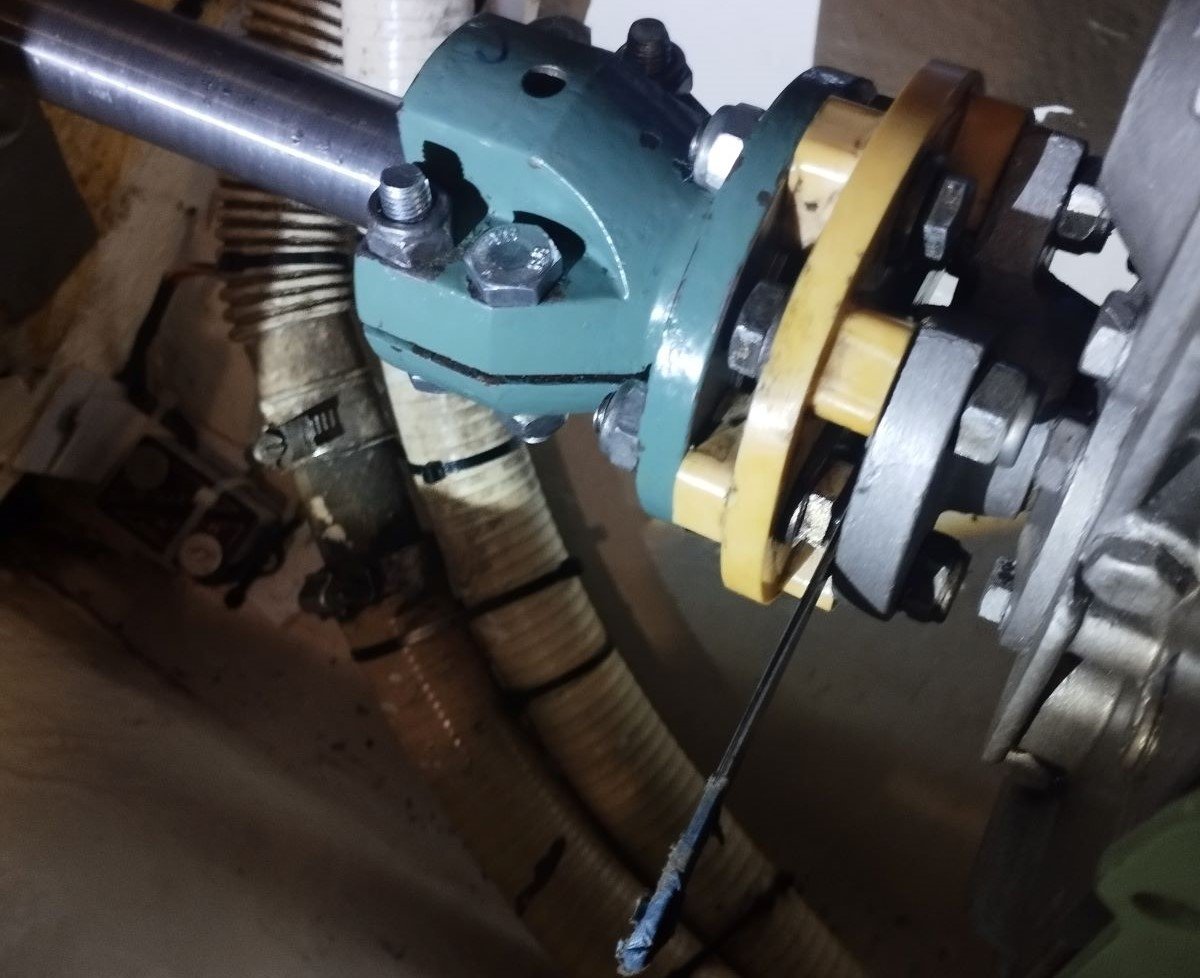
At the engine end of the shaft there is a coupling, a metal fitting that clamps securely around the flat end of the shaft. On some boats this coupler then connects directly to the gearbox fitting. However, we chose to have a flexible coupler fitted, which sits between the shaft coupler and the gearbox.
The gearbox is bolted to the engine, and the engine sits on four mounts with soft feet.


How Is The Stern Tube Sealed Against Water Ingress?
We have a Packless Sealing System (PSS) shaft seal, manufactured by PYI Inc. We switched to this type of system from a stuffing box when we had the Volvo engine installed. There are pros and cons of each – sometimes we regret not sticking with the simpler method of using grease and wadding. However, the stuffing box method needs to have a slight drip to keep the prop shaft cool, so there will always be some water in the bilge.
The PSS system is dry – water is blocked through the use of a stainless steel rotor with a super smooth face turning against a stationary carbon stator. An advantage is that once fitted, it shouldn’t need any further maintenance for many years. However, we did have a problem in the past where the propeller shaft overheated due to air bubbles not venting correctly through the vent hose. This then blocked the flow of cooling water to the PSS. We modified the run of the hose and since then, when the engine is running, we now regularly check that water is passing through the clear sided air vent hose.
More information on a PSS can be found here.

What Does a Flexible Coupler Do?
A flexible coupler transmits torque from one rotating piece of equipment to another, in our case the shaft coupler and the gearbox. It also allows for a small amount of play in the prop shaft alignment.
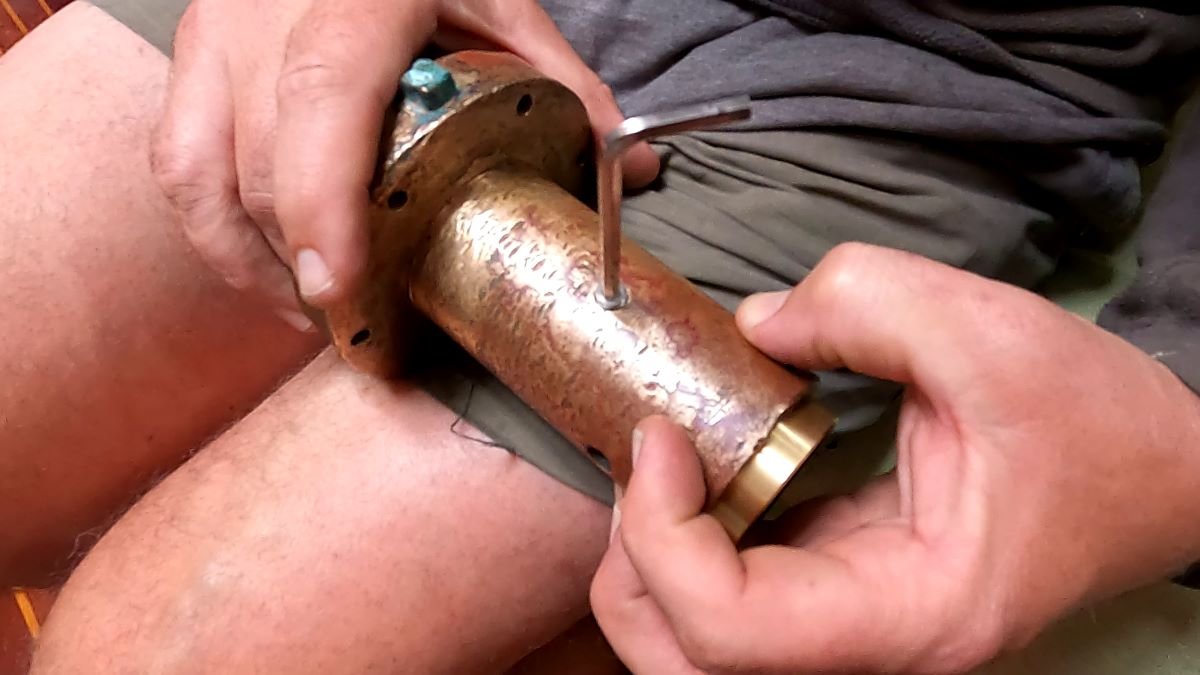
We use a R&D flexible coupler. It has a domed headed bolt which is used to check the alignment of the prop shaft after fitting.

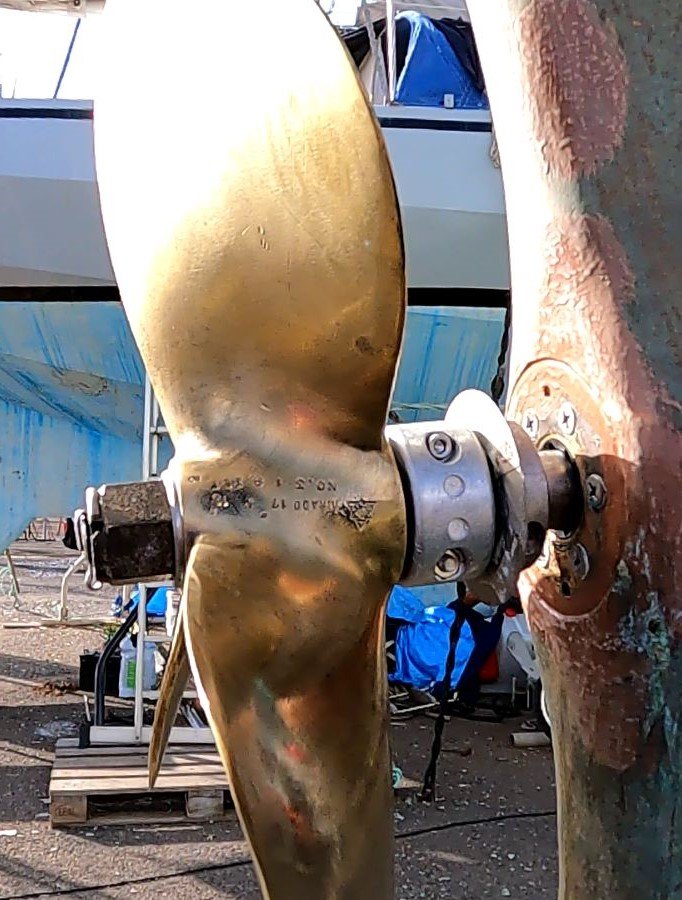
Prop Alternator
In 2013 we installed a prop alternator, fitted between the shaft coupler and the flexible coupler. When we are moving under sail, the propeller and shaft spin, albeit slowly. We utilised this spin to generate a small amount of power when we were sailing. It had provided another source of useful power, especially when sailing at night. However, improvements in renewable technology since then have diminished its usefulness.

Removing the Prop Shaft
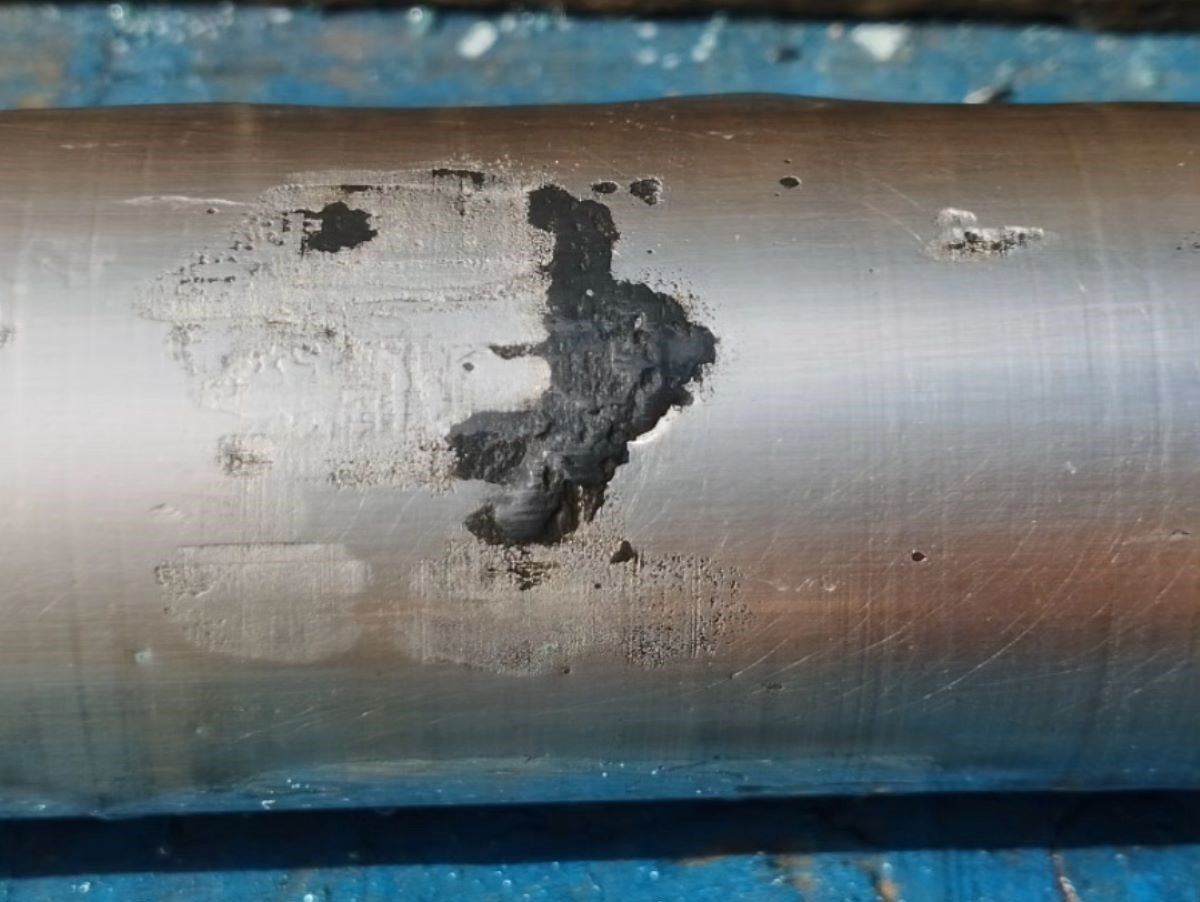
When we turned back to Porto Santo, we knew that there was a failed cutlass bearing because of the strong smell of burning rubber that had seeped into the aft cabin. We were very nervous that molten bits of rubber had damaged the PSS by sticking to the sealing faces of the rotor and carbon stator. Also, the heat in the prop shaft could have impacted the two O-rings inside the rotor. Any damage, and we would need to order replacements.
So, it was a relief to find that although lumps of rubber had gathered inside the bellows of the PSS, none had stuck on the sealing faces.
When we removed the prop shaft, there were obvious signs of damage from the overheat. Black marks dotted the surface along with some solid lumps of cutlass bearing rubber that had stuck to it.
With the shaft out, we could then remove the outer cutlass bearing. It was in pretty good condition, with barely any wear or degradation visible in the grooves.
The inner bearing was another story. The once well defined ridges on the inner surface had melted into a rough, crumbly surface.

What Could Have Caused an Overheating Propeller Shaft?
There were several potential causes of an overheating propeller shaft.
A Misaligned Engine
A search on Google for overheating propeller shaft returned with a misaligned engine as being the number one cause. If an engine is not lined up correctly with its propeller shaft, the shaft could be pulled away from its correct track. The prop shaft would then rub more against the side of a cutlass bearing or the shaft log, generating heat through friction.
A Bent Propeller Shaft
Last year, whilst the engine had been out of the boat being repaired, the propeller shaft had been left unattached and resting on the bearings in the shaft tube. However, the half meter that sticks out of the end of the tube had had no support. It was a stretch, but could the prop shaft have deformed?
When we pulled the shaft out, and looked down its length, there weren’t any obvious deformations. We searched around the boatyard and shed for a suitably long and flat surface on which to roll it. But, given that the shaft is a whopping 2.7m long, we just couldn’t find anything suitable.
A Cracked or Loose Cutlass Bearing
All the previous cutlass bearings that we’ve used have had a naval brass outer casing. That is until the last change, in 2022, when we swapped the inner bearing for one with a GRP casing. The bearing sits within the shaft log, with a screw to hold it snugly in place. Colin had drilled a small tapping hole into the outer case, then fastened a holding screw into the hole. But, in drilling the hole, could it have weakened the GRP which had subsequently cracked?
However, we were able to rule this out. Although the inner part of the bearing was toast, the outer casing was completely intact, with no visible signs of cracking.
The Propeller Alternator
When we took the prop alternator plate off, we could see that there was quite a lot of wear where it connects between the couplings. Could this wear have affected the propeller shaft’s alignment?
Putting The Drive Train Back Together
We’ve had many years of trouble free motoring in Emerald, and have successfully changed the cutlass bearings three times during our 19 years of ownership. So what had caused an overheating propeller shaft this time around? The biggest difference is that the engine was removed and replaced, so it seemed most likely that engine misalignment was to blame. We had checked and adjusted the alignment after reinstalling the engine last year. However, the location of the prop alternator hinders access to the flexible coupling and it’s possible that we made a mistake.
We also mistakenly thought that the flexible coupler did more heavy lifting in terms of alignment, than it actually does. So, we hadn’t checked the alignment when Emerald was back in the water. On the hard, the hull is only supported in a few places, which can cause the whole boat to deform. The door to the head and aft cabin didn’t close properly, so in hindsight, there were clues that she was bent out of shape. As the hull settled back in the water, it would have found its natural shape again. This could mean that the engine had shifted slightly, and possibly pulled the shaft out of line. It does only take a small misalignment to become an issue. So, we’ll mark this down to a lesson learned the hard way.
Repairs and Improvements
We decided to remove the prop alternator, giving us better access to the flexible coupler to check the alignment. It also removed any risk that wear on the alternator disc was pulling the shaft out of alignment.
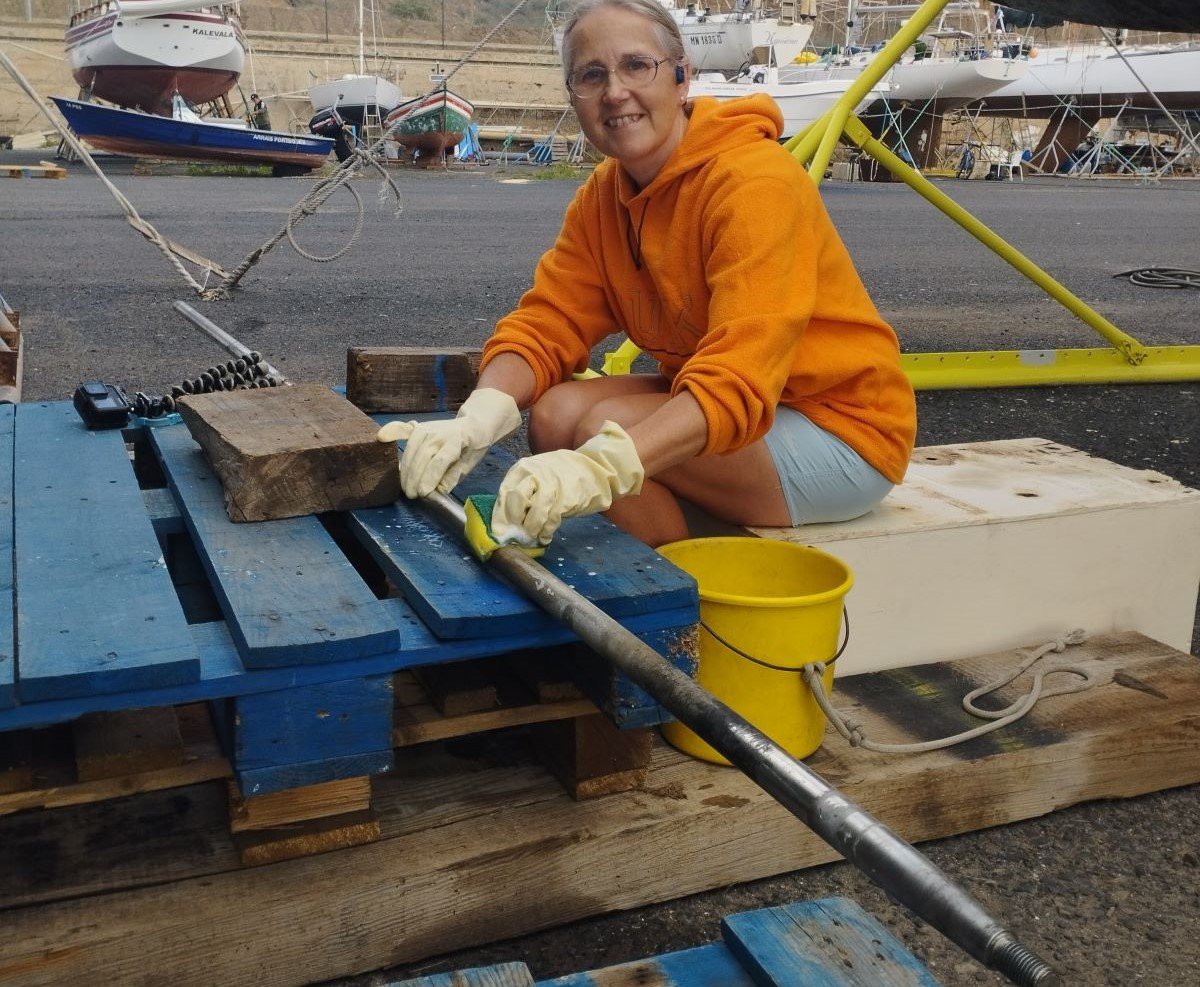
The prop shaft was cleaned and the scratches from the failed bearing were polished out. We replaced both cutlass bearings, using a naval brass one for the inner bearing instead of GRP. Although the GRP one didn’t show any cracks, we prefer the solidity of naval brass.
With the elements of drive train repaired or replaced, it was reinstalled, and we retested the engine alignment again. Using the feeler gauges and the testing point on the flexible coupler, we meticulously checked, adjusted and checked again until we were satisfied that the alignment was within tolerance.

Testing the Alignment
After returning to the water, we first needed to reattach the forestays and correctly tension the rigging. Then allow Emerald to settle back into her correct shape over a couple of days. We then carefully checked the prop shaft alignment again. A minor adjustment of the engine’s position was required, indicating that the hull was a little out of shape while on the hard.
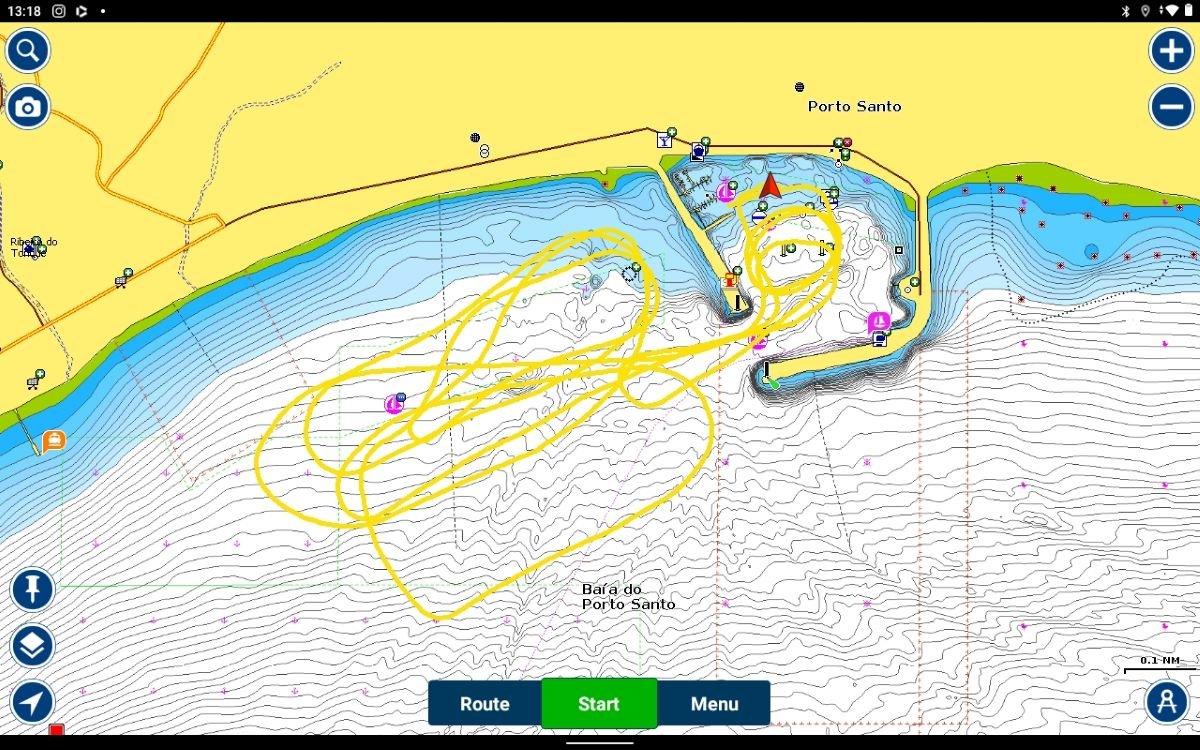
The big test was to head out to sea and run the engine under load for a couple of hours. We set off on a calm morning, first making laps at low revs around the harbour while regularly taking turns to go below to check the prop shaft temperature. Our concern that we might need to limp back initially constrained us to the harbour limits, but as we increased the revs and hence the boat speed, we soon realised that we needed more space. With the prop shaft still cool to the touch, we felt confident to head out to the protected bay beyond. Out there we upped the revs to our cruising speed. It was at this point that the overheat had become pronounced before, so it was a nervous moment for us. But reassuringly, the shaft remained at a normal temperature.
Many more loops followed, with us constantly checking the propeller shaft temperature. We increased the revs further, up to the max that we would ever run at. This was the first time since the engine rebuild that we’d run it at these revs, so it was doubly nerve wracking. Thankfully, everything performed correctly and we returned to cruising revs for some more loops. After nearly two hours, the prop shaft was still barely warm and certainly not hot.

What Next?
We declared the tests a success. Now we can return to planning our future adventures again. If only the weather would oblige with a good window to head south!
Other Boatyard Jobs – Repairing the Damaged Coppercoat
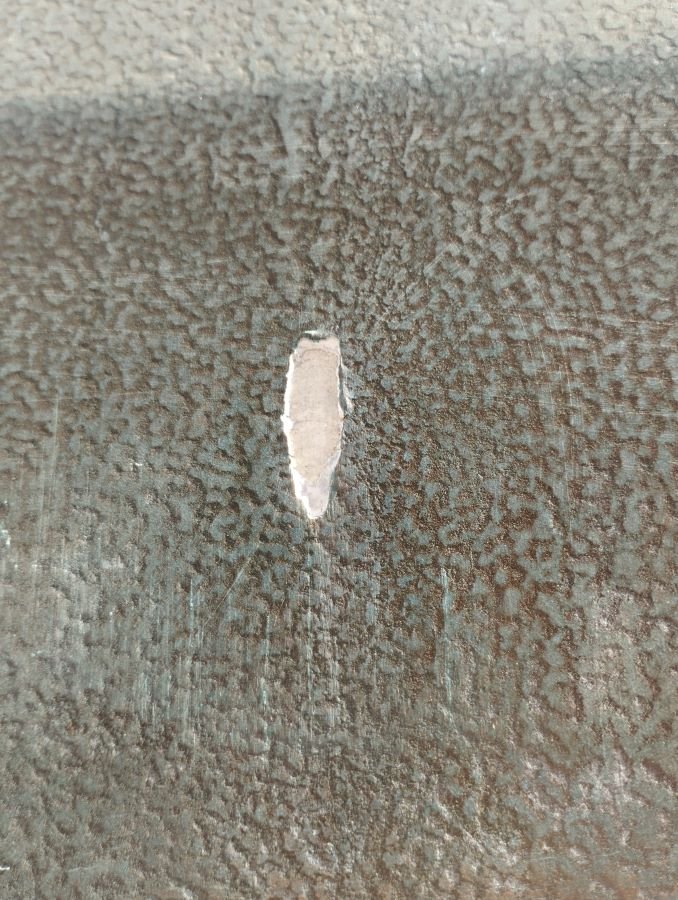
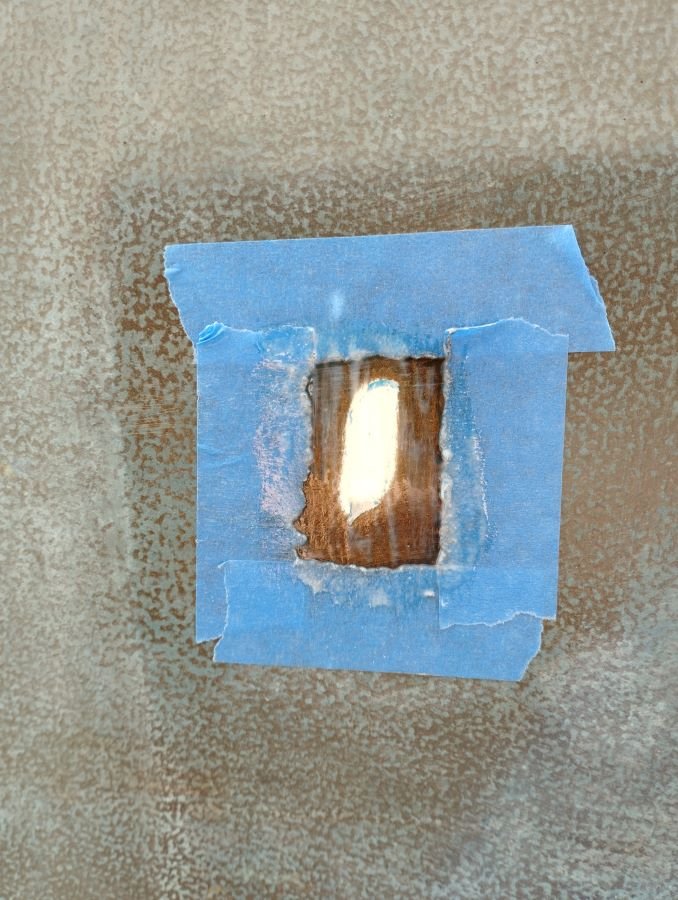
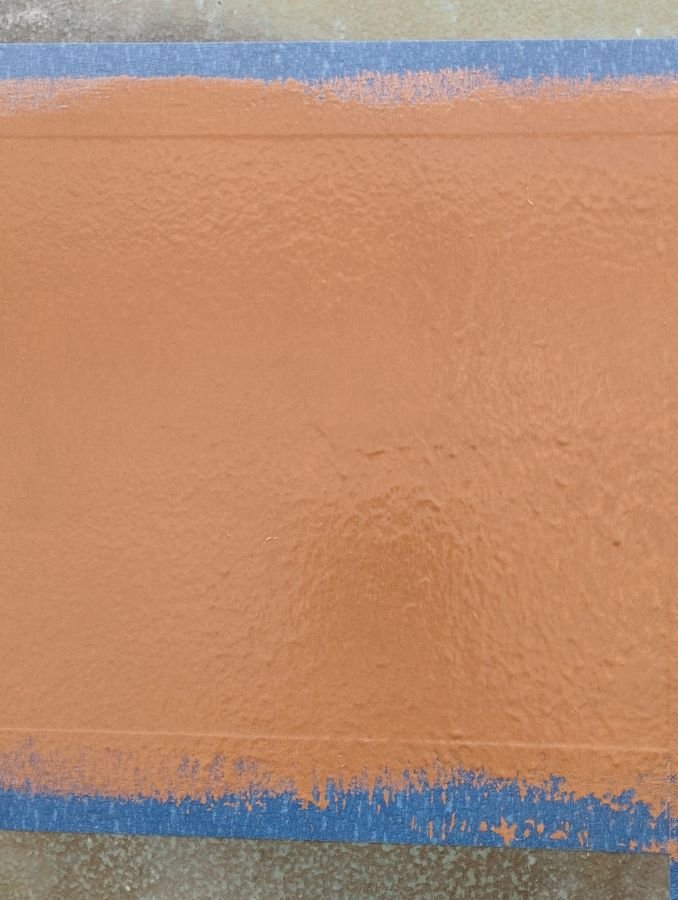
During our launch in October last year, I’d noticed that as the stands came away, they had pulled some pieces of Coppercoat away from the hull. The result was three 5cm holes in the protective coating, that would surely be a magnet for sea creatures to attach to. At the time, there was no time to make a repair, but now we had an opportunity to fix them.
We had a pack of Coppercoat left over from when we’d first applied it, and it was still onboard. However, Coppercoat has a best before date, and we were past that by 18 months. But with deliveries taking so long to the island, we decided to test whether what we had would still cure. We sanded a small section of the hull, and painted on the two part epoxy, minus the copper. It took a little longer than usual, but it did dry hard. So, we were able to repair the three holes, along with some scratches caused during the lift out.
The Social Media Bit: Want to Follow Us?
If you’d like to follow us on other social media platforms (Facebook, Instagram and YouTube), you can do so by using these links:
Or use the link below to track our voyage on NoForeignLand.com.

And finally, you can sign up to receive email notifications of new blogs using the subscribe box at the bottom of this page.
Thank you from Nichola & Colin