
On our arrival in Porto Santo, we’d discovered Emerald’s Volvo Penta D2-75 engine would not start. After sailing into the anchorage then being towed to a relatively safe anchor spot within the harbour, we had begun to investigate the problem. We had since replaced the fuel lift pump, but this was just a side track. Now, it seemed extremely likely that we had a hydrolocked engine. Somehow, water had found its way back into the engine from the exhaust system.
The evidence that pointed to a hydrolocked engine was the fact that despite trying various means, we couldn’t get the engine to turn over. To confirm the hydrolock and to attempt repairs, we would need to remove the engine head. With the cylinders then exposed, the hope was that we’d be able to clean them up and get them moving again. However, there were a lot of steps to complete before we got to that point.
Colin is pretty handy with general maintenance on the engine. This includes regular servicing such as oil and coolant changes, changing filters and replacing impellers. These are excellent skills to have for life on a boat and help keep maintenance costs down.
Over the years he has also successfully carried out more involved work including replacing the exhaust elbow, starter motor, turbo and water pump. These were all after market components, as the engine is well out of warranty. As an aside, we should probably change the engine’s name from Victor (the Volvo) to Frankenstein’s Monster.
However, removing the head was a huge step beyond. But what was there to lose? As the engine was already broken, could it get any worse? Well, yes it could. There would be plenty of risks along the way, but the alternatives were also very daunting and costly. It was a formidable task to undertake, but we had to try.
What is a Hydrolocked Engine?
The Volvo Penta D2-75 engine has four pistons which move up and down within their own cylinder. Underneath each piston is a connecting rod, all of which are connected to the crank shaft. All four pistons in effect move together: when two move down, the other two move up. The crank shaft then leads to the gearbox which turns the propeller to provide Emerald with mechanical power.
In normal use, air occupies the space above the pistons. When the pistons move up, the space within the top of the cylinder reduces. The laws of physics tell us that when air is compressed within a reducing volume, the temperature will rise. As the air compresses, the fuel injectors vaporise a tiny amount of combustible fuel (in our case diesel) and inject it into the top of the reducing cylinder space. Due to the high air temperature, the gas ignites, and the force pushes the piston back down. The process repeats as the other two pistons move up, compressing the air above them.
A hydrolocked engine occurs when liquid enters the engine’s cylinders. Since liquids are almost incompressible, the movement of the piston within the cylinder is subsequently limited. No movement, no compression, no temperature rise, no gas ignition, means no engine power.
In our case, the hydrolocked engine had been caused by sea water entering the engine block and its cylinders. The salty water made things worse: it is not good friends with cast steel. The water would have immediately begun to attack the steel, causing corrosion and rust. Even if the water had drained away, the damage left in its wake could write off the whole engine.
First Things First – Stripping the Engine of Its Components
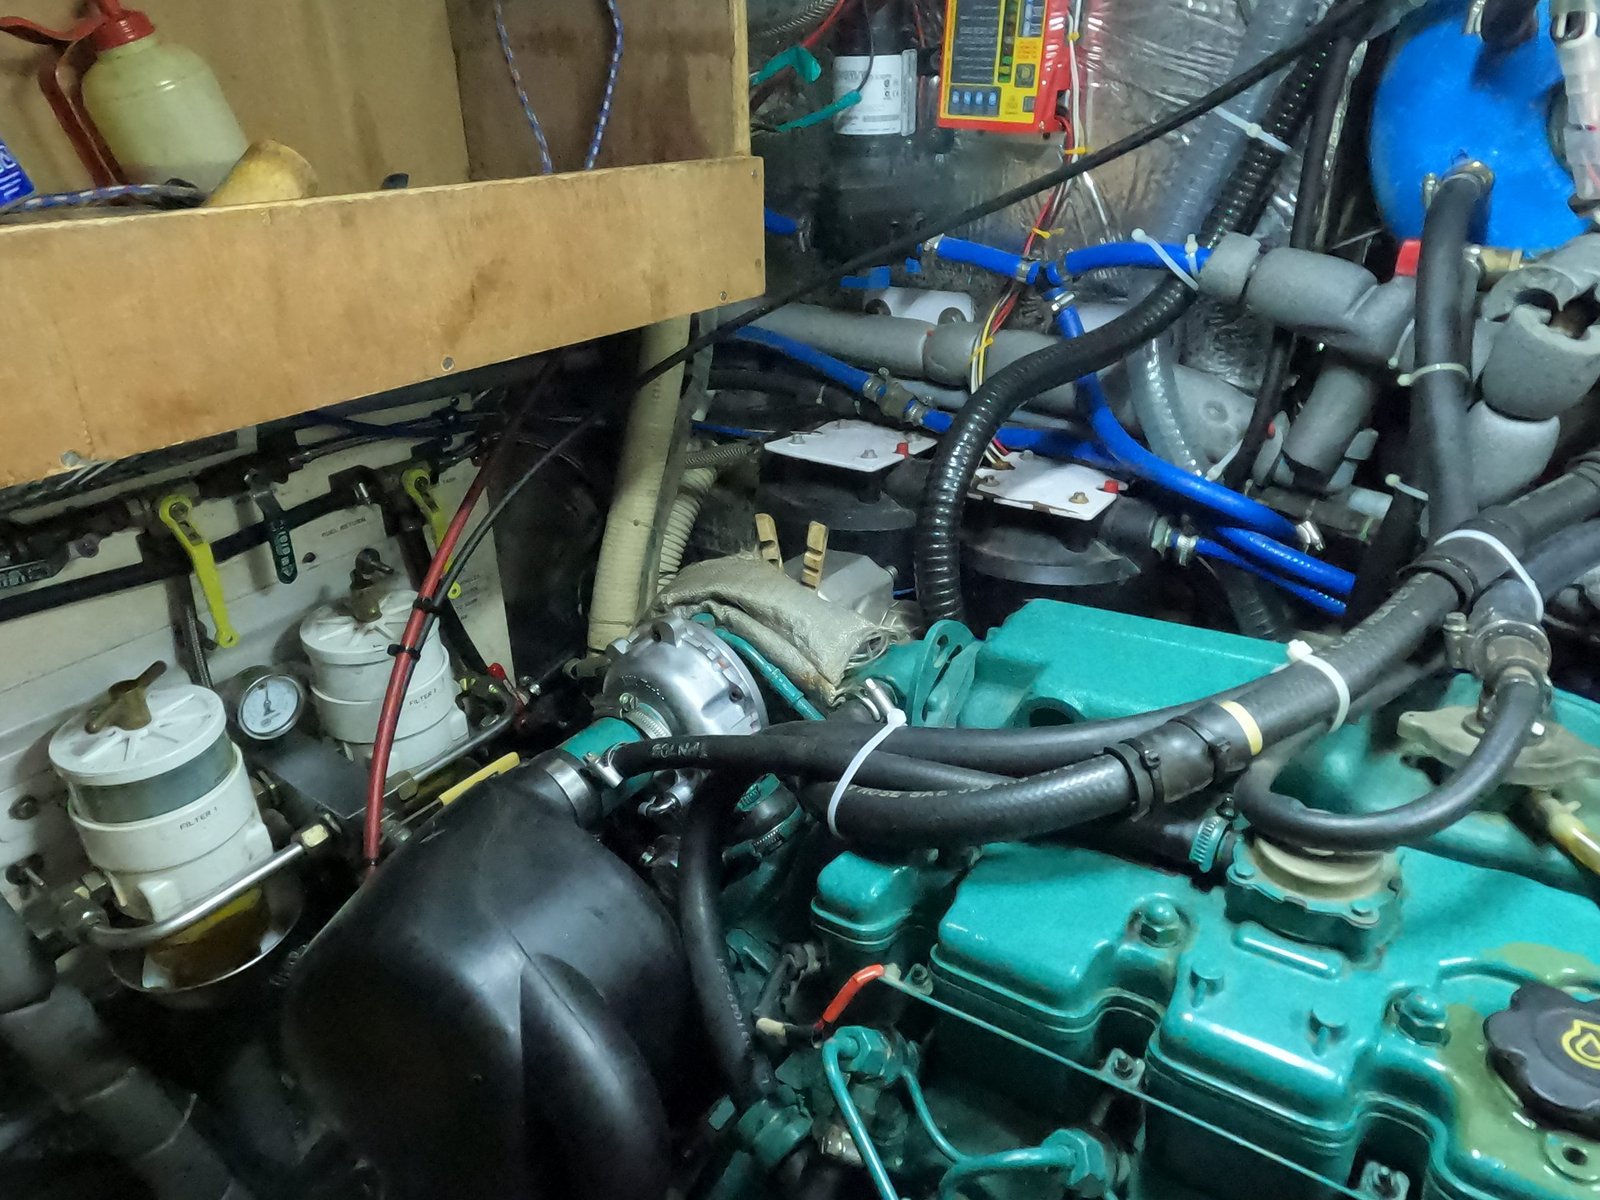
We needed to remove a number of ancillary components before we could get anywhere near the head.
First the alternator belt came off at the front of the engine and we checked that the motor for that turned OK. It did. Then we moved to the rear end of the engine. The exhaust elbow showed some signs of rust; this was disappointing given it had been cleaned only two months ago. Worse to come was the turbo. It had been shiny and new just two months ago; now it had a lot of rust. Thankfully it cleaned out OK, coming off in big globs of carbon and rust. The carbon had been laid down first, and acted as an aid when it came to cleaning. Finally at this end of the engine was the intercooler. We’d taken this off in the yard too when we were chasing down errant impeller lugs. Removing these components was reasonably straight forward as we’d replaced them previously.
Rocker Assembly
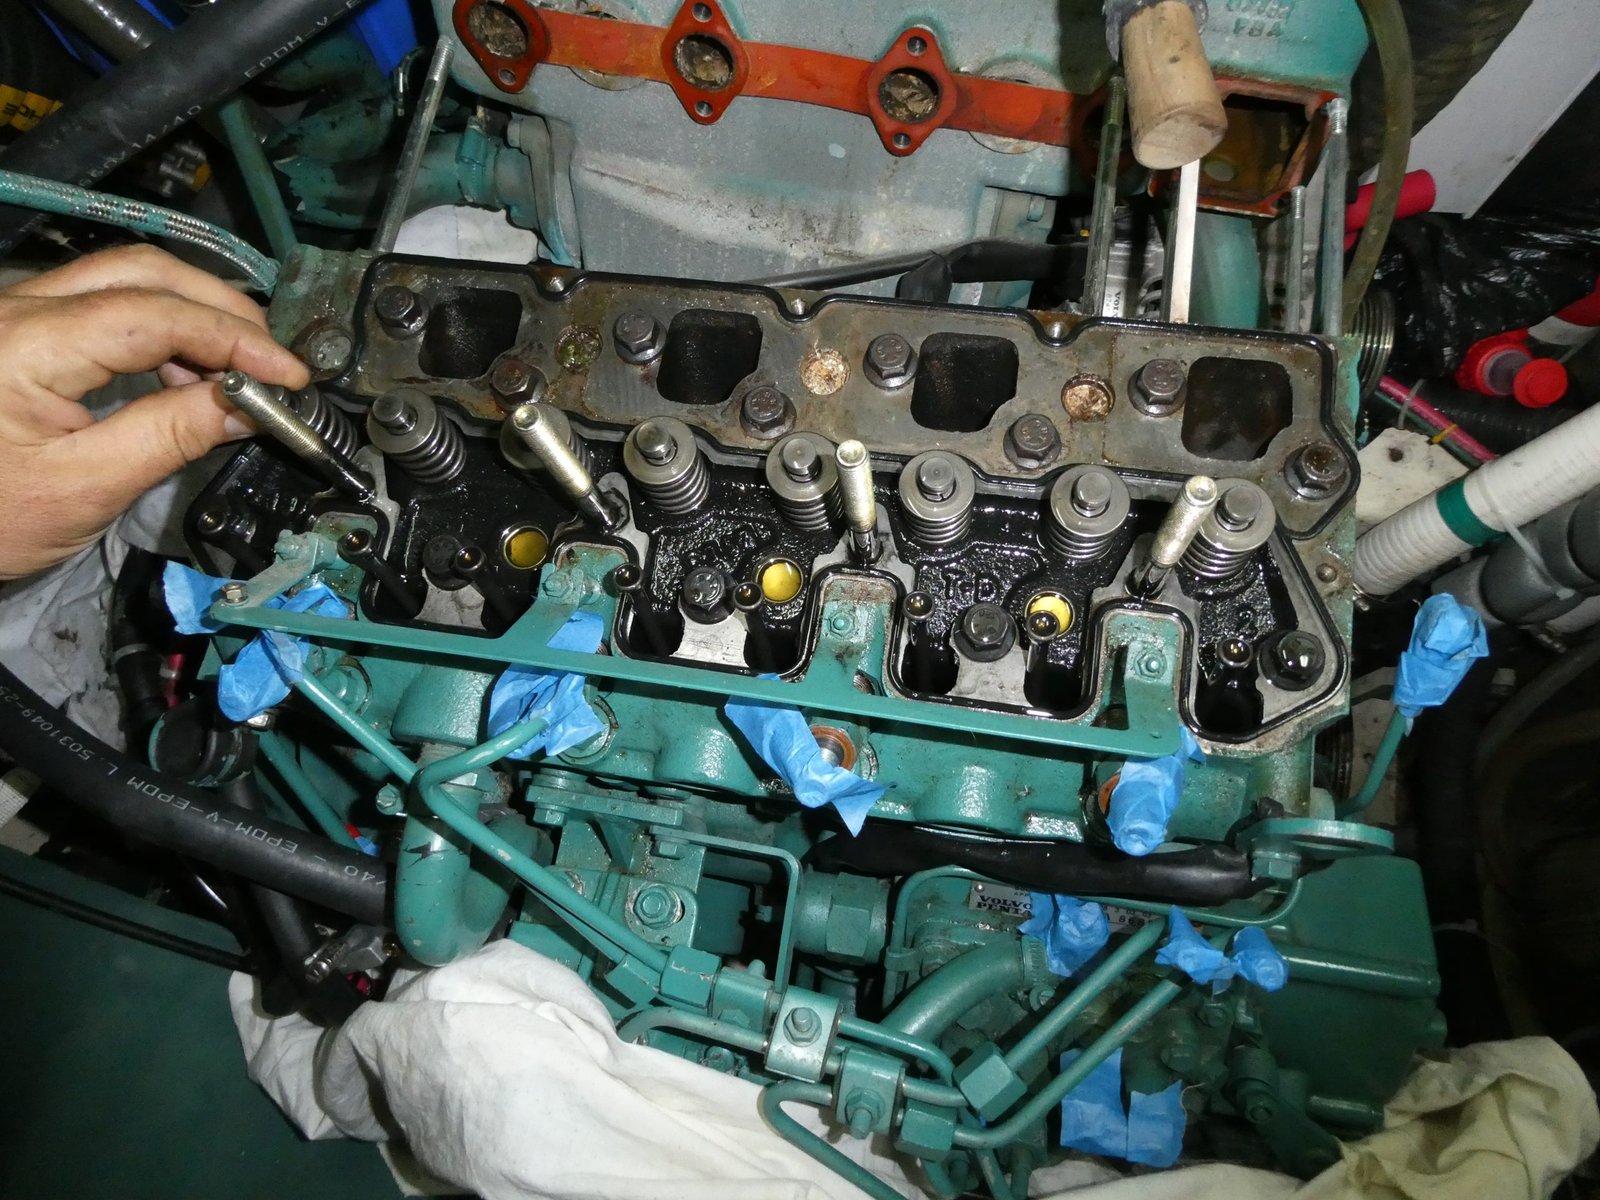
After this, we were moving into new ground. The rocker assembly and its protective lid came off easier than expected, with just 6 bolts to remove.
We could now see clearly into the inlet vents, which looked rusty. In some good news, this seemed to just be surface rust which wiped off fairly easily. We also got our first look at the valves. They moved when downward pressure was applied, however, the movement was sticky rather than easy. They would definitely need a clean before reassembly.
Exhaust Manifold and Heat Exchanger
The heat exchanger and exhaust manifold sit on the far side of the engine from where we have access. This coupled with the weight of them added complexity to the job. In addition, dregs of coolant that had been lurking in the curved pipes showed their presence by dribbling out onto the engine and engine room floor. Colin had already drained the coolant, but it’s impossible to remove every last drop. Boat jobs are rarely simple!
Where Do We Put Everything?
At this point Emerald was still floating in the water and we needed to make sure we continued to have access to parts of the boat. So where could we put the engine components, some of which were quite big and cumbersome?
We left the exhaust manifold in the engine room by pushing it away from the side of the engine and left it balanced on some wooden blocks. We didn’t want to risk lifting it over the exposed head at this point given its weight.

When I was growing up, I remember seeing jokey stories of guys (and possibly some gals too) with their motorbikes taken apart in their parent’s kitchen. That’s how we felt as an ever growing collection of engine parts took up residence on the saloon floor.
At times going to the loo was like negotiating an obstacle course as we tried to make sure we didn’t step on a delicate piece of engine.
Off With Its Head
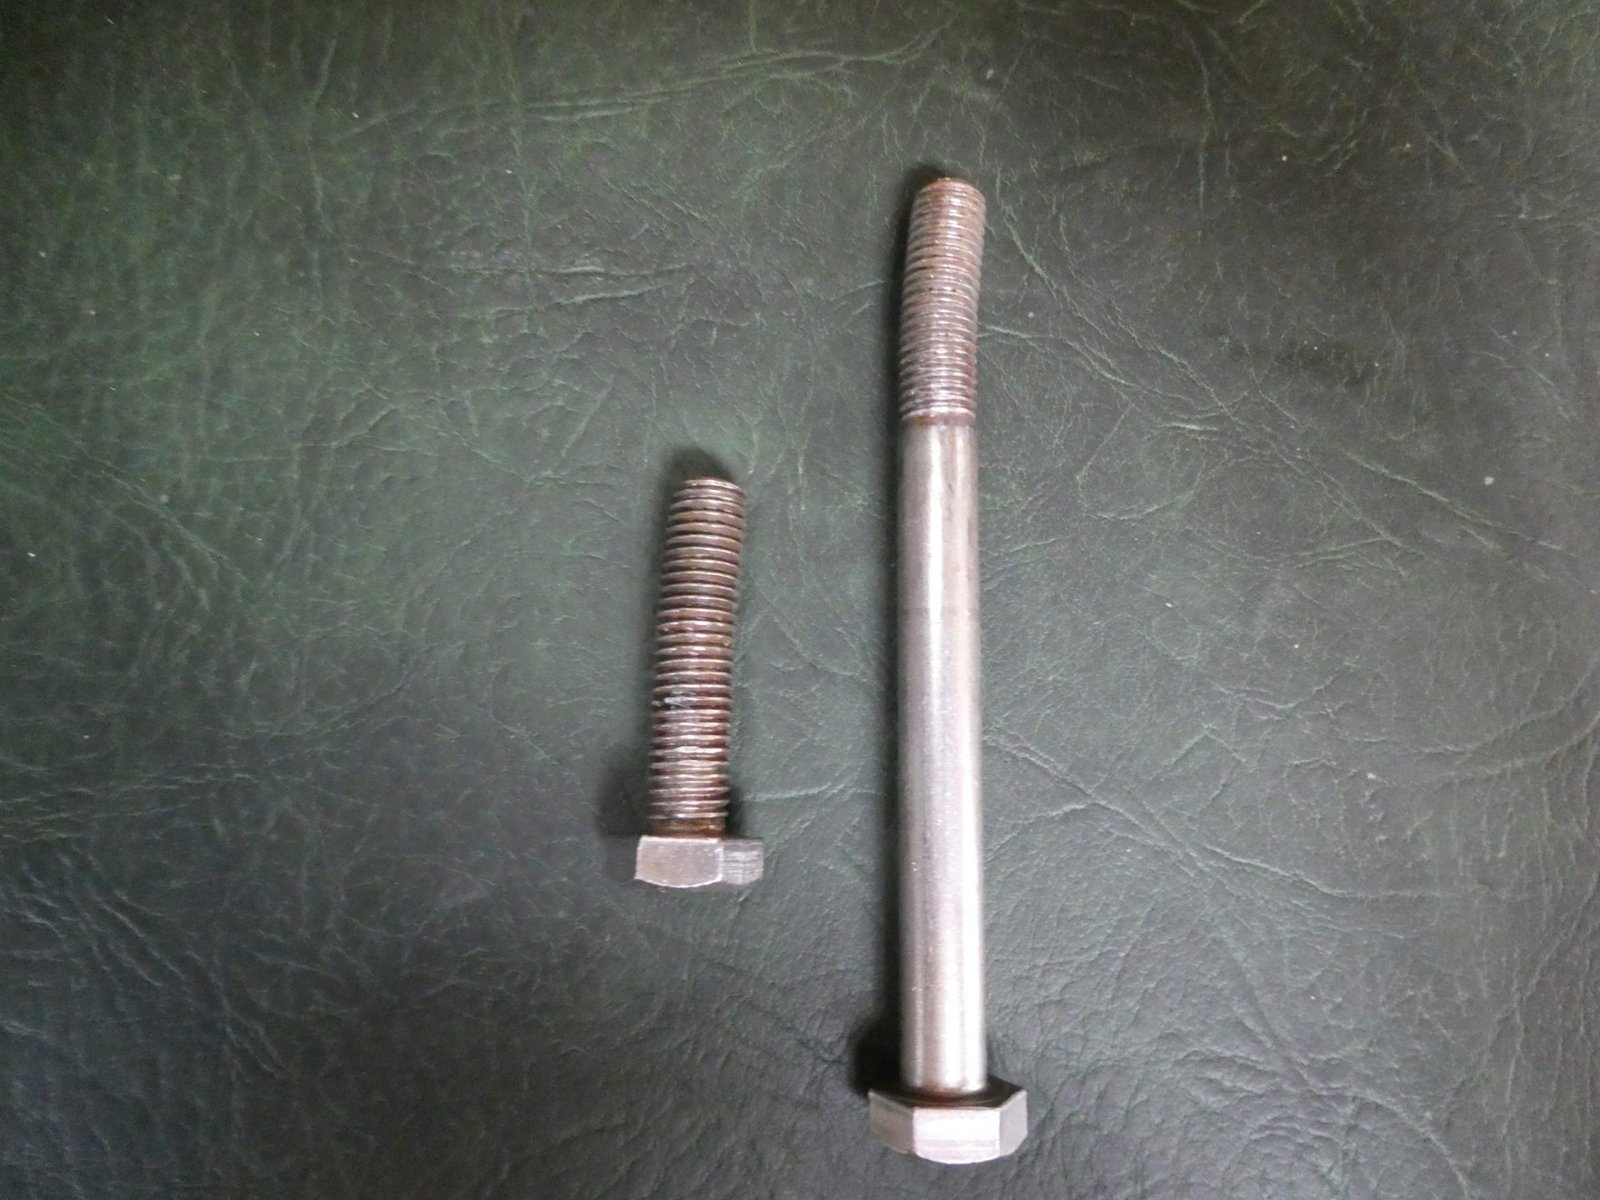
The engine head has 18 bolts, four short and 14 long. Each bolt must be loosened in a particular order. So, using the engine manual as a guide and a ratchet for a tool, Colin painstakingly worked his way through them. The crack as each one gave way made our hearts jump every time. It was not a good sound, and made us think something had broken.
Each bolt had to be cracked, then he would move onto the next in order. Once all of them had been loosened, he could work back through them releasing them completely.
We placed each bolt into a numbered bag, as, come reassembly, they would need to go back into the slot they’d come out of. But, when we got the time to inspect them fully, it was evident that reusing them was a bad idea. The majority were in OK condition, however a number of them showed signs of bad corrosion with the threads completely eaten away. The worst ones corresponded with the locations that had been the hardest to free.


Sourcing Replacement Engine Parts
We decided that replacing all the bolts would be the sensible thing to do. We also needed a new exhaust manifold gasket, as it was damaged during removal. But where to get replacement parts?
Pre-Brexit we would have ordered from a British company called Parts4Engines. However, since leaving the EU, we’d heard of some bad experiences regarding postal deliveries in general. These included orders becoming lost or spending weeks in customs. The supplier has made arrangements for delivery in most EU countries, however Portugal is not one of these yet. We felt concerned about the unknown customs charges that could be levied. For such critical components, it seemed sensible for us to try and source from within the EU.
Volvo Penta have a website that lists dealers near to your location. Our nearest dealer was in Madeira, and they provided an excellent service. The parts were with us in just over a week, this included delivery time to the dealer. It’s a shame we couldn’t say the same for the other parts that we ordered online.
Getting the Pistons Moving Again
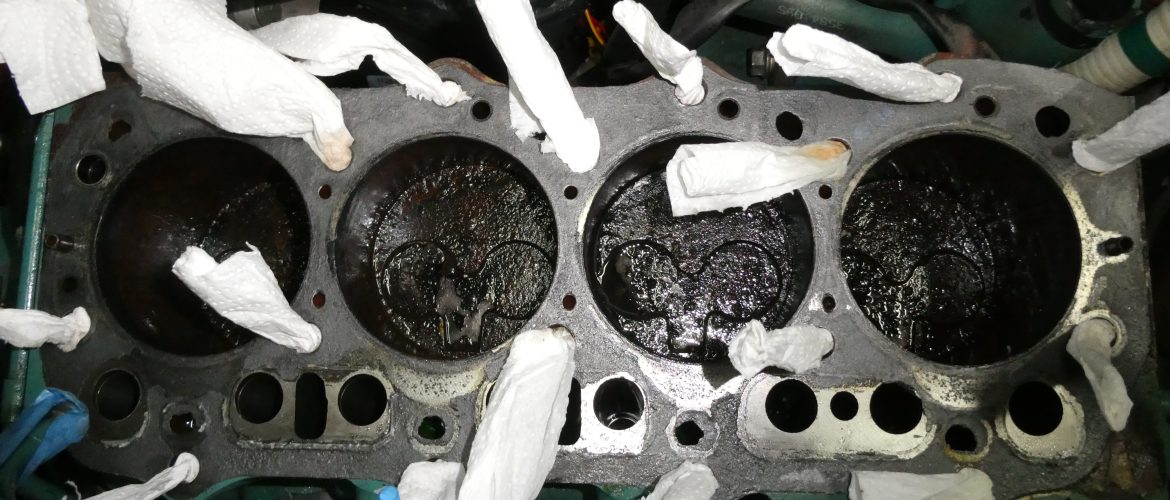
With the head of the engine removed, we got our first look at the condition of the pistons and cylinders of a hydrolocked engine. The visible rust pointed to there having definitely been water in there at some point, but it had since drained away. There had been some initial movement of the pistons in the first few days after arrival, but now they were jammed solid.
Colin started off by cleaning up the rust in the sections of cylinder that were accessible. The pistons had stopped in a position with two up and two down. He cleaned using Emory paper as this doesn’t have abrasive bits that drop off and could cause future damage to the cylinders. Overnight he soaked the cylinders with WD40 and diesel to help break down the rust.
It’s also worth pointing out that the engine has almost 3000 hours of use on it, and this model is particularly prone to build up of carbon. There was a liberal application of black carbon on each cylinder’s surface as well as rust.
Having cleaned as much carbon and rust as was visible, it was impossible to delay the bashing any longer. Yes there was a lot of procrastination as the risks were high. Remember those rods that connect the pistons to the crank shaft? They are fragile and easily bent. If that happened, we would have to lift the engine out to replace them.

Hitting the Pistons
So, what to hit the pistons with? We couldn’t hit them directly with a hammer as the pistons are made of aluminium and would likely break. Instead, we’d need something softer to transfer the power, and wood makes a good material. We’d looked around the boatyard for suitably hard lumps of wood of the right size to fit on top of the piston. Colin started off using a standard hammer to apply the force.
The wood we’d chosen turned out to not be up to the job. It was too soft and splintered too easily. One of the chips went down one of the push rod holes. Cue some creative time to come up with a solution for retrieving a tiny chip of wood from out of a 20cm deep hole. Duct tape wrapped around the pointy end of a metal BBQ skewer did the trick after several failed attempts. After that we blocked up all the push rod holes and head bolt holes to prevent anything like this side tracking us again.

Hit Them With Something Harder
The pistons weren’t moving so Colin was advised to hit them with something harder. The new hammer of choice was a 7lb lump hammer which is heavy and has a big surface area.
He’d also spotted the wooden bungs kept next to the engine seacock and and tried one of those. They were much more hard wearing than the wood we’d used previously, but still had a limited lifespan. Luckily we had a few available and with the help of some duct tape wrapped around them we managed to eke out a longer life.
After a day of zero progress and much hitting, Colin got a small amount of movement! And all 4 pistons were moving together, which meant that the piston rods were most likely OK. It felt like a small miracle! Colin reckoned 30 whacks with the hammer gave a millimeter of movement. When enough cylinder had been exposed, he cleaned off any visible rust.
Two more exhausting days of hammering and cleaning the cylinders followed. Overnight we sprayed in WD40 to help free up any exposed rust. By the end of the week all four cylinders had been moved through a full up and down cycle.
The Right Tools For The Job
With all four pistons moving, we tried turning them via the crank. Very early on in our engine woes, we’d screwed two long bolts into the crank shaft pulley. Then using a long metal bar, we’d applied pressure to try and turn the crank. This had worked to an extent, but with the pistons still only moving stiffly within their cylinders, we were concerned about the bolts breaking.
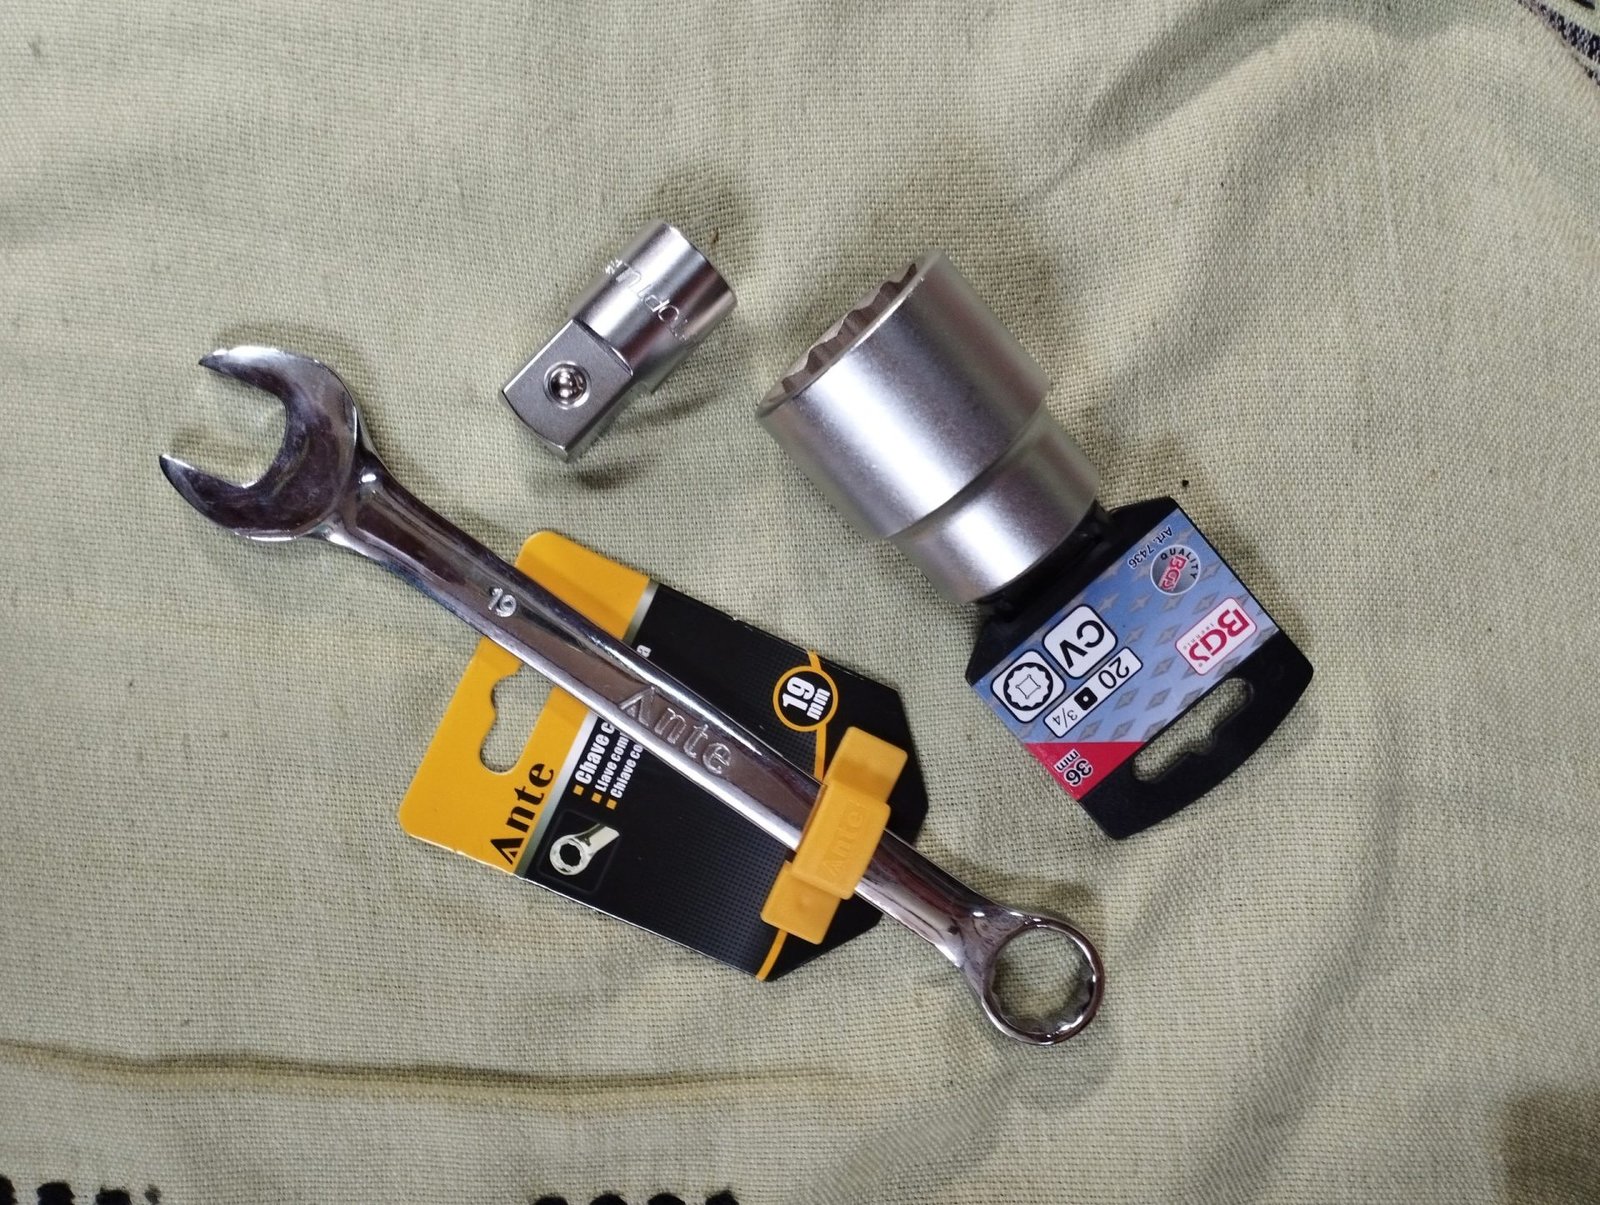
Colin took one of the bolts out, and it had indeed bent. The ideal solution would be to find a 36mm socket to fit to the nut on the crank shaft pulley. Would we find one in town?
Since we began working on the engine, we’ve sought out every single car and motorbike repair and maintenance shop on the small island. We’ve had some successes and some disappointments in our quest for tools and parts. Amazingly one of them had the large socket we needed, plus the reducer to allow it to be used with our socket handle. Each of these finds felt like small victories in our battle to fix the engine.
From Despair to Hope
We’d started the week feeling very disheartened, with the pistons jammed solid and a mammoth job ahead of us. By Thursday hope began to glimmer when there was miniscule movement, which soon turned to a full cycle. By Saturday we had the pistons turning via the crank. Then on Sunday we used the starter motor to turn them over. Nichola was sitting by the engine at the time, observing the movement. As the pistons moved rapidly up and down, they flung out some of the WD40, which liberally coated her. But it was worth it to see the pistons moving so freely.
There followed a few more days of soaking, cleaning and turning the engine via the starter motor. We repeated these steps until the WD40 remained clear, signalling that all the rust was gone, then repeated for a few days more. Each time the engine turned was balm to our souls, there was now a good chance we could now remedy this situation.
Getting the pistons moving was an enormous leap forward, and now the clean up of all the other engine components could begin.
The Social Media Bit: Want to Follow Us?
Thank you for reading this far, we really appreciate it. If you’ve enjoyed our site or found it useful, please consider a donation via the DONATE button below. We’re grateful for anything you can spare!
If you’d like to follow us on other social media platforms (Facebook, Instagram and YouTube), you can do so by using these links:
Or use the link below to track our voyage on NoForeignLand.com.
And finally, you can sign up to receive email notifications of new blogs using the subscribe box at the bottom of this page.
Thank you from Nichola & Colin
A great summary of a very trying and morale sapping experience. Really pleased but not surprised to get to end and read that the rebuild is under way and the seeming continuous hours of effort giving little to no reward have given way to the imaginary view of victor firing up for real.. 🙂 …I said not surprised because having followed the tales of emerald and her crew for many years…you pair are resilient, resourceful and determined when faced with adversity.
Thanks Phil, it’s certainly been an experience! Seeing the pistons moving freely made us so happy
Total respect….I couldn’t have done that in a million years. We’re only part-time liveaboards, but your blog doles out heaps of inspiration and insights that are so valuable for us. Hope the engine makes it back to full working order.
Hi Stuart, thank you for your comment and good wishes, we really appreciate it when we get them.
The engine has definitely been a journey! Hopefully one that we don’t have to go on again